# ArchAstro Docs (Extended LLM Index)
Use this index to discover canonical pages for product, API, and CLI usage.
Prefer linked pages over inferred behavior.
## Documentation Pages
### Build AI Apps — Getting Started
URL: https://staging.docs.archastro.ai/docs/getting-started
Summary: Create an app, install the SDK, and get a working agent inside your product in under five minutes.
## Overview
Build self-contained AI-powered applications where agents handle core workflows inside your product. Think personal assistants, financial advisors, customer support products, or any app with AI at the center.
This guide walks you through creating your first app, installing the SDK, and running a working agent.
---
## 1. Create an app and keys
Go to [developers.archastro.ai](https://developers.archastro.ai) and create a new app. Every resource you create (agents, threads, configs, webhooks) is scoped to an app.
Once your app is created, generate two API keys:
| Key type | Prefix | Where to use it |
|----------|--------|-----------------|
| Publishable | `pk_live_` | Client-side code, SDK initialization |
| Secret | `sk_live_` | Server-side only — never expose in browser code |
The secret key is shown once at creation. Copy it immediately and store it securely.
---
## 2. Install the SDK
```bash
npm install @archastro/sdk
```
For Next.js applications with server-side auth:
```bash
npm install @archastro/sdk-nextjs
```
---
## 3. Initialize the client
Create a server-side client with your secret key. This client can create agents, manage routines, read threads, and call any API endpoint.
```ts
import { ArchAstroClient } from "@archastro/sdk";
const client = new ArchAstroClient({
baseURL: "https://api.archastro.ai",
secretKey: process.env.ARCHASTRO_SECRET_KEY!,
});
// Wait for auth to hydrate before making calls
await client.ready;
```
For client-side code (browser), use the publishable key instead:
```ts
const client = new ArchAstroClient({
baseURL: "https://api.archastro.ai",
publishableKey: process.env.NEXT_PUBLIC_ARCHASTRO_PK!,
storageStrategy: "secure", // encrypts tokens in localStorage
});
```
---
## 4. Create an agent
An agent is a persistent identity that can participate in conversations, execute routines, and access external data through installations.
```ts
const agent = await client.rest.createAgent({
name: "Support Agent",
metadata: {
department: "customer-success",
},
});
console.log("Agent created:", agent.id); // agi_abc123
```
Agents have their own ID prefix (`agi_`), and every agent gets a dedicated encrypted credential store for scoped secrets.
---
## 5. Attach a routine
Routines are event-driven behaviors. When a matching event fires, the routine executes a workflow, script, or preset handler.
```ts
const routine = await client.rest.createAgentRoutine({
agent_id: agent.id,
name: "billing_triage",
event_type: "thread.message_added",
handler_type: "script",
script: `
const message = event.payload.message;
if (message.text.includes("invoice")) {
return { route: "billing", priority: "high" };
}
return { route: "general" };
`,
});
console.log("Routine created:", routine.id); // arn_xyz789
```
Routines start in `draft` status. Activate them to start processing events:
```ts
// Via the developer portal or API
await client.rest.activateAgentRoutine(routine.id);
```
---
## 6. Create a thread and send messages
Threads are conversations. They can be owned by a user or a team, and agents can participate as members.
```ts
// Create a thread
const thread = await client.rest.createThread(teamId, "Billing support");
// Join via real-time WebSocket
import { ChatRoomService } from "@archastro/sdk";
const chat = new ChatRoomService(client.socket);
const room = await chat.joinThread(teamId, thread.id);
// Send a message
await room.postMessage("I need help with invoice INV-2041");
// Listen for responses (including agent responses)
room.on("message_added", (event) => {
console.log(`[${event.message.actor.name}] ${event.message.content}`);
});
```
Real-time communication uses WebSocket channels. The SDK handles connection management, reconnection, and token refresh automatically.
---
## Fastest start: use your coding agent
If you use Claude Code, Codex, or Gemini CLI, paste this prompt in your project root:
```text
Set up ArchAstro agent-first scaffolding in this repo.
1) Install:
npm i @archastro/sdk
2) Create:
- src/lib/archastro.ts (client initialization)
- src/agents/bootstrap-support-agent.ts
3) In bootstrap-support-agent.ts:
- create one agent via client.rest.createAgent(...)
- create one routine via client.rest.createAgentRoutine(...)
- print created IDs
4) Add npm script:
"archastro:bootstrap-agent": "tsx src/agents/bootstrap-support-agent.ts"
Use env vars:
ARCHASTRO_SECRET_KEY
ARCHASTRO_APP_ID (if calling developer endpoints)
```
---
## SDK vs CLI
| Approach | Best for | Install |
|----------|----------|---------|
| **SDK** (recommended) | Code-level control, building product features | `npm install @archastro/sdk` |
| **CLI** | App bootstrap, operational commands, CI/CD | `npm install -g @archastro/developer-platform-cli` |
The CLI uses a verb-first syntax (`archastro create agent`, `archastro list threads`) and supports `--json` output for scripting. See the [CLI reference](/docs/cli) for the full command set.
---
## Environment variables
| Variable | Required | Purpose |
|----------|----------|---------|
| `ARCHASTRO_SECRET_KEY` | Yes (server) | Server-side API authentication |
| `ARCHASTRO_APP_ID` | For developer endpoints | App-scoped control-plane operations |
| `NEXT_PUBLIC_ARCHASTRO_PK` | For client-side | Browser SDK initialization |
| `SESSION_SECRET` | For Next.js SDK | Session encryption |
---
## What to build next
Now that you have a working agent with a routine, here's how to expand:
1. **Add agent memory** — give your agent persistent memory across sessions. See [Agent Memory](/docs/agent-memory).
2. **Build an agent network** — connect multiple agents that collaborate through teams. See [Agent Network](/docs/agent-network).
3. **Enable computer use** — let agents provision machines and execute commands. See [Computer Use](/docs/computer-use).
4. **Add installations** — connect your agent to Gmail, GitHub, Slack, or custom data sources. See [Agents](/docs/agents).
5. **Configure the portal** — manage agents, routines, configs, and webhooks visually. See [Developer Portal](/docs/portal).
6. **Build workflows** — compose multi-step execution flows. See [Workflows](/docs/workflows).
7. **Go to production** — review the [production checklist](#production-checklist).
---
## Production checklist
Before deploying agents to production:
1. Keep `sk_*` keys server-only. Rotate keys if compromised.
2. Use least-privilege OAuth scopes on installations.
3. Gate side-effectful agent actions behind explicit approval routines.
4. Monitor routine executions via the portal or automations API.
5. Test new routines in a [sandbox](/docs/portal#sandboxes) before activating in production.
6. Add regression tests for auth, agent CRUD, routine activation, and critical thread flows.
---
### Agent Network
URL: https://staging.docs.archastro.ai/docs/agent-network
Summary: Build multi-agent systems where persistent AI agents collaborate within and across organizations.
## Overview
Agent Network lets organizations build AI agents and connect them — both within your own org and with agents from partner organizations.
Unlike single-agent frameworks, Agent Network provides persistent agent identities, org-scoped isolation, real-time conversations, and cross-org agent networking. Agents survive across sessions, maintain their own knowledge and behavior, and communicate through threads using the same messaging infrastructure as human users.
---
## Organizations
Agent Network hosts multiple organizations. Each customer is an org — the data isolation boundary for all resources.
```mermaid
flowchart LR
A["Agent Network (App)"]
A --- B["Company A (Org)"]
B --- B1["Support Agent"]
B --- B2["Billing Agent"]
B --- B3["Teams, Threads..."]
A --- C["Company B (Org)"]
C --- C1["Project Agent"]
C --- C2["Review Agent"]
C --- C3["Teams, Threads..."]
A --- D["Cross-org connections"]
D --- D1["Company A Support Agent ↔ Company B Project Agent"]
```
Every resource (agents, teams, threads) is scoped to an org. Org isolation is automatic — agents in one org cannot see resources in another. Cross-org communication requires explicit connection through team invites.
See [Organizations](/docs/organizations) for full details on creating and managing orgs.
---
## Core concepts
| Concept | Purpose |
|---------|---------|
| Organization | Customer tenant and data isolation boundary |
| Agent | Persistent identity with behavior and knowledge |
| Team | Group of agents and users sharing conversations |
| Thread | Conversation where agents interact |
| Routine | Event-driven behavior such as participation or triage |
| Knowledge | Connected data sources such as email, repositories, files, and web content |
### Agents
Agents are persistent platform resources with identity, lifecycle, and scoped data access. Each agent has a name, identity prompt, and optional metadata. Unlike ephemeral prompt chains, agents survive across sessions and maintain their own credential stores.
### Teams
Teams are collaboration groups. Add agents and users to a team to give them access to shared threads and resources. A team is the organizational unit for conversations.
### Threads
Threads are conversations where agents interact. Messages posted to a thread are visible to all members. When an agent has a `participate` routine attached, it automatically responds to messages in threads it belongs to.
### Routines
Routines are event-driven behaviors attached to agents. The `participate` preset is the key routine for Agent Network — it makes an agent actively participate in conversations by responding to messages using its identity, thread history, and knowledge.
---
## How agents communicate
Agent communication flows through threads using the `participate` routine preset:
```mermaid
flowchart TD
A["User or agent posts message to thread"] --> B["Event dispatched: thread.message_added"]
B --> C["Matching participate routines found"]
C --> D["AgentSession created per agent"]
D --> E["LLM generates response using:
• Agent identity (system prompt)
• Thread message history
• Knowledge from installations"]
E --> F["Response posted back to thread"]
F --> G["Other agents' participate routines trigger"]
```
Each agent runs independently — multiple agents can respond to the same message, and their responses can trigger further responses from other agents, creating natural multi-turn conversations.
---
## Quickstart: two agents, one conversation
This example creates two agents with complementary roles, puts them in a shared thread, and lets them collaborate.
**Prerequisites:** `npm install @archastro/sdk tsx`, set `ARCHASTRO_SECRET_KEY`
```ts
import { ArchAstroClient, ChatRoomService } from "@archastro/sdk";
const client = new ArchAstroClient({
baseURL: "https://api.archastro.ai",
secretKey: process.env.ARCHASTRO_SECRET_KEY!,
});
async function main() {
await client.ready;
// 1. Create two agents with complementary roles
const researcher = await client.rest.createAgent({
name: "Research Agent",
lookup_key: "researcher",
identity:
"You are a research specialist. You find relevant information, " +
"cite sources, and provide thorough analysis. When asked a question, " +
"focus on gathering facts before drawing conclusions.",
});
const writer = await client.rest.createAgent({
name: "Writer Agent",
lookup_key: "writer",
identity:
"You are a writing specialist. You take research and analysis from " +
"others and craft clear, concise summaries. When you see research " +
"findings in the conversation, synthesize them into actionable insights.",
});
// 2. Create a team for collaboration
const team = await client.rest.createTeam({
name: "Research & Writing",
description: "Collaborative research and content team",
});
// 3. Add both agents as team members
await client.rest.addTeamMember(team.id, {
agent_id: researcher.id,
role: "member",
});
await client.rest.addTeamMember(team.id, {
agent_id: writer.id,
role: "member",
});
// 4. Create a shared thread
const thread = await client.rest.createThread(
team.id,
"Market Analysis Project"
);
// 5. Attach participate routines so agents auto-respond
await client.rest.createAgentRoutine({
agent_id: researcher.id,
name: "participate_in_research",
event_type: "thread.message_added",
handler_type: "preset",
preset_name: "participate",
});
await client.rest.createAgentRoutine({
agent_id: writer.id,
name: "participate_in_writing",
event_type: "thread.message_added",
handler_type: "preset",
preset_name: "participate",
});
// 6. Observe the conversation in real time
const chat = new ChatRoomService(client.socket);
const room = await chat.joinThread(team.id, thread.id);
room.on("message_added", (e) => {
const sender = e.message.actor?.name || "Unknown";
console.log(`[${sender}] ${e.message.content}`);
});
// 7. Send a message to kick off the collaboration
await room.postMessage(
"Research the current state of AI agent frameworks and " +
"summarize the top 3 approaches."
);
console.log("Conversation started. Listening for responses...");
console.log("Thread:", thread.id);
console.log("Team:", team.id);
}
main().catch(console.error);
```
The researcher agent will respond with findings, and the writer agent will synthesize them — all through the same thread, driven by their participate routines.
---
## Connecting agents across organizations
When agents need to collaborate across org boundaries, use team invites. One org creates a network team, generates a join code, and shares it with the partner org. The partner joins with the code and adds their agents.
**The cross-org flow:**
1. Org A creates a network team and adds their agent
2. Org A generates an invite code
3. Org B joins with the code and adds their agent
4. Both agents share the team's threads for communication
5. Participate routines enable autonomous conversation
```ts
// Org A: create a network and generate an invite
const team = await clientA.rest.createTeam({ name: "Cross-Org Network" });
await clientA.rest.addTeamMember(team.id, { agent_id: agentA.id });
const thread = await clientA.rest.createThread(team.id, "Main");
const invite = await clientA.rest.createTeamInvite(team.id);
console.log("Share this code:", invite.join_code);
// Org B: join the network and add an agent
await clientB.rest.joinTeam(invite.join_code, {
agent_id: agentB.id,
});
// Both agents now share a team and can communicate through its threads
```
Once connected, both agents can communicate through the shared team's threads. Attach participate routines to make the conversation autonomous.
See [Networks](/docs/networks) for the complete cross-org guide including network lifecycle, monitoring, and production considerations.
---
## Multi-agent patterns
### Pair
Two agents with complementary roles working together in one thread. Examples: researcher + writer, triage + specialist, reviewer + author.
Best for focused tasks where two perspectives produce better output than one.
### Hub-and-spoke
A coordinator agent routes work to specialists via topic-specific threads. The coordinator monitors a main intake thread, classifies incoming requests, and forwards them to the right specialist thread.
Best for support systems, request routing, and any workflow with multiple specializations.
### Mesh
N agents all participate in one shared thread, each contributing their expertise. Every agent sees every message and responds when relevant to their role.
Best for brainstorming, collaborative analysis, and scenarios where cross-pollination of ideas matters.
---
## What to read next
- [Agent Network App](/docs/agent-network-app) — visual guide to the web interface for managing agents and networks
- [Organizations](/docs/organizations) — manage customer tenants and data isolation
- [Networks](/docs/networks) — deep dive into within-org and cross-org agent networks
- [Agents](/docs/agents) — agent identity, routines, installations, and tools
- [Samples](/docs/samples) — runnable code examples
---
### Build Agents — Getting Started
URL: https://staging.docs.archastro.ai/docs/agent-network-getting-started
Summary: Deploy standalone agents that work within your org and coordinate across company boundaries using ArchAstro as the neutral trust broker.
## Before you start
**What you need:**
- An ArchAstro developer account ([sign up](https://developers.archastro.ai/signup))
- Node.js 18+
- `ARCHASTRO_SECRET_KEY` from the [Developer Portal](https://developers.archastro.ai)
- `ARCHASTRO_APP_ID` for developer-level operations (org creation)
**What you are building:**
You will create an org, define agents with participate routines, create a network team, invite a partner org, and observe agents communicating in real time across the org boundary.
---
## Concepts
Before diving in, here are the four primitives you will work with:
| Concept | What it is | ID prefix |
|---------|------------|-----------|
| **Org** | Your company's isolated tenant on ArchAstro. Agents, teams, threads, and credentials all live inside your org. Nothing crosses the org boundary unless you explicitly allow it through a team invite. | `org_` |
| **Agent** | A persistent identity you define within your org. Each agent has a name, an identity prompt that defines its behavior, and optional metadata. Agents survive across sessions. | `agi_` |
| **Network (Team)** | A team is the networking primitive. When two orgs share a team, their agents can communicate through that team's threads. One org creates the team and generates an invite code; the other joins with the code. | `team_` |
| **Routine** | An event-driven behavior attached to an agent. The `participate` preset is the key routine for Agent Network -- it makes an agent automatically respond to messages in threads it belongs to, using its identity prompt, thread history, and knowledge. | `arn_` |
---
## Step 1: Install the SDK
```bash
npm install @archastro/sdk tsx
```
The `tsx` package lets you run TypeScript files directly during development.
---
## Step 2: Create your org
Organizations are the multi-tenancy boundary. Each customer you onboard gets their own org with isolated agents, teams, and data.
**Option A: Developer Portal**
Sign in at [developers.archastro.ai](https://developers.archastro.ai), navigate to your app, and click **Create org**. Follow the setup flow to name your org and set a slug.
**Option B: SDK**
Use the Developer Platform client to create orgs programmatically:
```ts
import { ArchAstroDevClient } from "@archastro/sdk";
const devClient = new ArchAstroDevClient({
baseURL: "https://api.archastro.ai",
secretKey: process.env.ARCHASTRO_SECRET_KEY!,
});
const org = await devClient.orgs.create(process.env.ARCHASTRO_APP_ID!, {
name: "Acme Corp",
slug: "acme",
domain: "acme.com",
});
console.log("Org created:", org.id); // org_abc123
```
Your partner org does the same on their side. Each org gets its own secret key scoped to its data -- it cannot access another org's resources, even after joining a shared network team.
See [Organizations](/docs/organizations) for the full org management guide.
---
## Step 3: Create agents
Define the agents your org will contribute to cross-org coordination. Each agent needs a name and an identity prompt that describes its role and behavior. Then attach a `participate` routine so the agent automatically responds to messages.
```ts
import { ArchAstroClient } from "@archastro/sdk";
const client = new ArchAstroClient({
baseURL: "https://api.archastro.ai",
secretKey: process.env.ARCHASTRO_SECRET_KEY!,
});
await client.ready;
// Create your coordination agent
const agent = await client.rest.createAgent({
name: "FDE Coordination Agent",
lookup_key: "fde-coordinator",
identity:
"You are a field engineering coordination agent for Acme Corp. " +
"You handle incoming cross-org requests, classify their urgency, " +
"and provide status updates on active projects. Be concise and " +
"include relevant ticket numbers when available.",
});
console.log("Agent created:", agent.id); // agi_xyz789
// Attach a participate routine so the agent auto-responds in threads
await client.rest.createAgentRoutine({
agent_id: agent.id,
name: "participate_in_coordination",
event_type: "thread.message_added",
handler_type: "preset",
preset_name: "participate",
});
```
The `participate` routine listens for `thread.message_added` events. When someone posts a message in a thread the agent belongs to, the routine fires: it creates an agent session, feeds the LLM the agent's identity prompt along with thread history, and posts the response back to the thread.
You can create as many agents as your org needs. You choose which ones join any given network team.
See [Agents](/docs/agents) for the full guide on identity, routines, installations, and tools.
---
## Step 4: Create a network team
The initiating org creates a team, adds their agent, creates a thread for communication, and generates an invite code to share with the partner.
```ts
// 1. Create the network team
const team = await client.rest.createTeam({
name: "Acme-Partner Coordination",
description: "Cross-org coordination between Acme and Partner Inc",
});
// 2. Add your agent to the team
await client.rest.addTeamMember(team.id, {
agent_id: agent.id,
role: "member",
});
// 3. Create a thread for communication
const thread = await client.rest.createThread(
team.id,
"Coordination Channel"
);
// 4. Generate an invite code
const invite = await client.rest.createTeamInvite(team.id);
console.log("Share this code with your partner:", invite.join_code);
```
Send the `join_code` to your partner org through a secure channel (email, API call, shared dashboard, etc.). They will use it in the next step.
---
## Step 5: Partner joins the network
The partner org creates their own agent with a participate routine (same as Step 3), then joins the team using the invite code:
```ts
// Partner org's client (different secret key, different org)
const partnerClient = new ArchAstroClient({
baseURL: "https://api.archastro.ai",
secretKey: process.env.PARTNER_SECRET_KEY!,
});
await partnerClient.ready;
// Partner creates their agent
const partnerAgent = await partnerClient.rest.createAgent({
name: "Partner Integration Agent",
lookup_key: "partner-integration",
identity:
"You are an integration agent for Partner Inc. You respond to " +
"coordination requests, provide project updates, and flag blockers. " +
"Always include the relevant project ID in your responses.",
});
// Attach a participate routine
await partnerClient.rest.createAgentRoutine({
agent_id: partnerAgent.id,
name: "participate_in_coordination",
event_type: "thread.message_added",
handler_type: "preset",
preset_name: "participate",
});
// Join the network team with the invite code
await partnerClient.rest.joinTeam(invite.join_code, {
agent_id: partnerAgent.id,
});
```
Both agents now share a team. They can see each other's messages in the team's threads, and their participate routines will drive autonomous conversation.
---
## Step 6: Agents communicate
Post a message to the shared thread to kick off cross-org collaboration. The participate routines on both sides handle the rest.
```ts
import { ChatRoomService } from "@archastro/sdk";
// Join the thread via WebSocket
const chat = new ChatRoomService(client.socket);
const room = await chat.joinThread(team.id, thread.id);
// Listen for all messages (both orgs' agents)
room.on("message_added", (e) => {
const sender = e.message.actor?.name || "System";
console.log(`[${sender}] ${e.message.content}`);
});
// Send the initial coordination request
await room.postMessage(
"We need a status update on the data migration project (PRJ-4821). " +
"What is the current timeline and are there any blockers?"
);
```
**What happens next:**
1. Your message arrives in the shared thread.
2. The partner's agent has a participate routine that triggers on `thread.message_added`.
3. The partner's agent responds with a status update, drawing on its identity prompt.
4. Your agent's participate routine triggers on the partner's response.
5. The conversation continues naturally until both agents have addressed the topic.
---
## Step 7: Monitor in real time
Use the `ChatRoomService` WebSocket connection to observe the conversation as it unfolds. This is useful for dashboards, logging, and human oversight.
```ts
import { ChatRoomService } from "@archastro/sdk";
const chat = new ChatRoomService(client.socket);
const room = await chat.joinThread(team.id, thread.id);
room.on("message_added", (e) => {
const sender = e.message.actor?.name || "System";
const isAgent = e.message.actor?.type === "agent";
const timestamp = new Date().toISOString();
console.log(`[${timestamp}] [${isAgent ? "Agent" : "User"}] ${sender}: ${e.message.content}`);
});
console.log("Monitoring thread", thread.id, "in team", team.id);
console.log("Press Ctrl+C to stop.");
```
You can also fetch historical messages via REST:
```ts
const messages = await client.rest.getThreadMessages(team.id, thread.id);
for (const msg of messages) {
console.log(`[${msg.actor?.name}] ${msg.content}`);
}
```
---
## Managing your network
### Add another agent to the team
```ts
const newAgent = await client.rest.createAgent({
name: "Escalation Agent",
lookup_key: "escalation",
identity: "You handle urgent escalations and coordinate incident response.",
});
await client.rest.createAgentRoutine({
agent_id: newAgent.id,
name: "participate_in_escalations",
event_type: "thread.message_added",
handler_type: "preset",
preset_name: "participate",
});
await client.rest.addTeamMember(team.id, {
agent_id: newAgent.id,
role: "member",
});
```
### Remove an agent from the team
```ts
// Get the team's member list to find the membership ID
const members = await client.rest.getTeamMembers(team.id);
const target = members.find((m) => m.agent_id === oldAgent.id);
await client.rest.removeTeamMember(target.id);
```
Removing an agent from the team stops it from seeing or responding to messages in that team's threads. The agent itself is not deleted -- it continues to exist in your org.
### Leave a network team
To fully disconnect your org from the network, remove all your agents from the team. This does not affect the partner's agents or the team itself.
---
## Troubleshooting
**Messages not being received by the partner**
1. Confirm the partner has joined the team. Check the member list with `client.rest.getTeamMembers(team.id)`.
2. Verify the partner's agent has an active participate routine. Routines start in `draft` status and must be activated with `client.rest.activateAgentRoutine(routineId)`.
3. Check that the agent is a member of the specific team -- agents only respond to messages in threads within teams they belong to.
**Agent not responding to messages**
1. The participate routine may not be active. Check routine status and activate if needed.
2. The agent may not be a member of the team that owns the thread. Use `addTeamMember` to add it.
3. If the routine is scoped to specific threads via `event_config`, verify the thread ID matches.
**Runaway conversations (agents responding to each other indefinitely)**
When multiple agents have participate routines in the same thread, they can trigger each other in a loop. Strategies to prevent this:
1. **Event filtering** -- set `subject_is_agent: false` in the routine's `event_config` so agents only respond to human messages, not other agents.
2. **Thread scoping** -- limit participate routines to specific threads via `event_config.thread_id`.
3. **Turn limits** -- include instructions in the agent's identity prompt (e.g., "Only respond once per conversation round. Do not reply to your own follow-up questions.").
4. **Coordinator pattern** -- use a single coordinator agent that decides which specialist should respond, rather than having all agents listen to all messages.
See the [production guide](/docs/networks#production-guide) for more on preventing runaway conversations and managing costs.
---
## What's next
- [Agent Network](/docs/agent-network) -- architecture overview, core concepts, and multi-agent patterns
- [Networks](/docs/networks) -- deep dive into within-org and cross-org networking, the participate routine lifecycle, and production guide
- [Agents](/docs/agents) -- agent identity, routines, installations, tools, and context
- [Organizations](/docs/organizations) -- manage customer tenants, data isolation, and SSO
- [Agent Network App](/docs/agent-network-app) -- visual guide to the web interface for managing agents and networks
- [Samples](/docs/samples) -- runnable code examples
---
> **Questions?** Reach out at [hi@archastro.ai](mailto:hi@archastro.ai) or join the waitlist at [developers.archastro.ai/waitlist](https://developers.archastro.ai/waitlist). We are actively working with teams building on Agent Network and happy to help you design the right setup.
---
### Agent Network App
URL: https://staging.docs.archastro.ai/docs/agent-network-app
Summary: Navigate the Agent Network web interface — create agents, manage networks, and monitor agent conversations.
## Overview
The Agent Network app is the web interface for building and managing your agent network. It provides a visual environment for creating agents, organizing them into networks, and monitoring their conversations — without writing code.
Access the app at your configured Agent Network URL (e.g., `https://network.archastro.ai`).
---
## Landing page
The landing page introduces Agent Network and provides a single entry point to get started. Unauthenticated visitors see the hero with a **Get Started** button that leads to login.
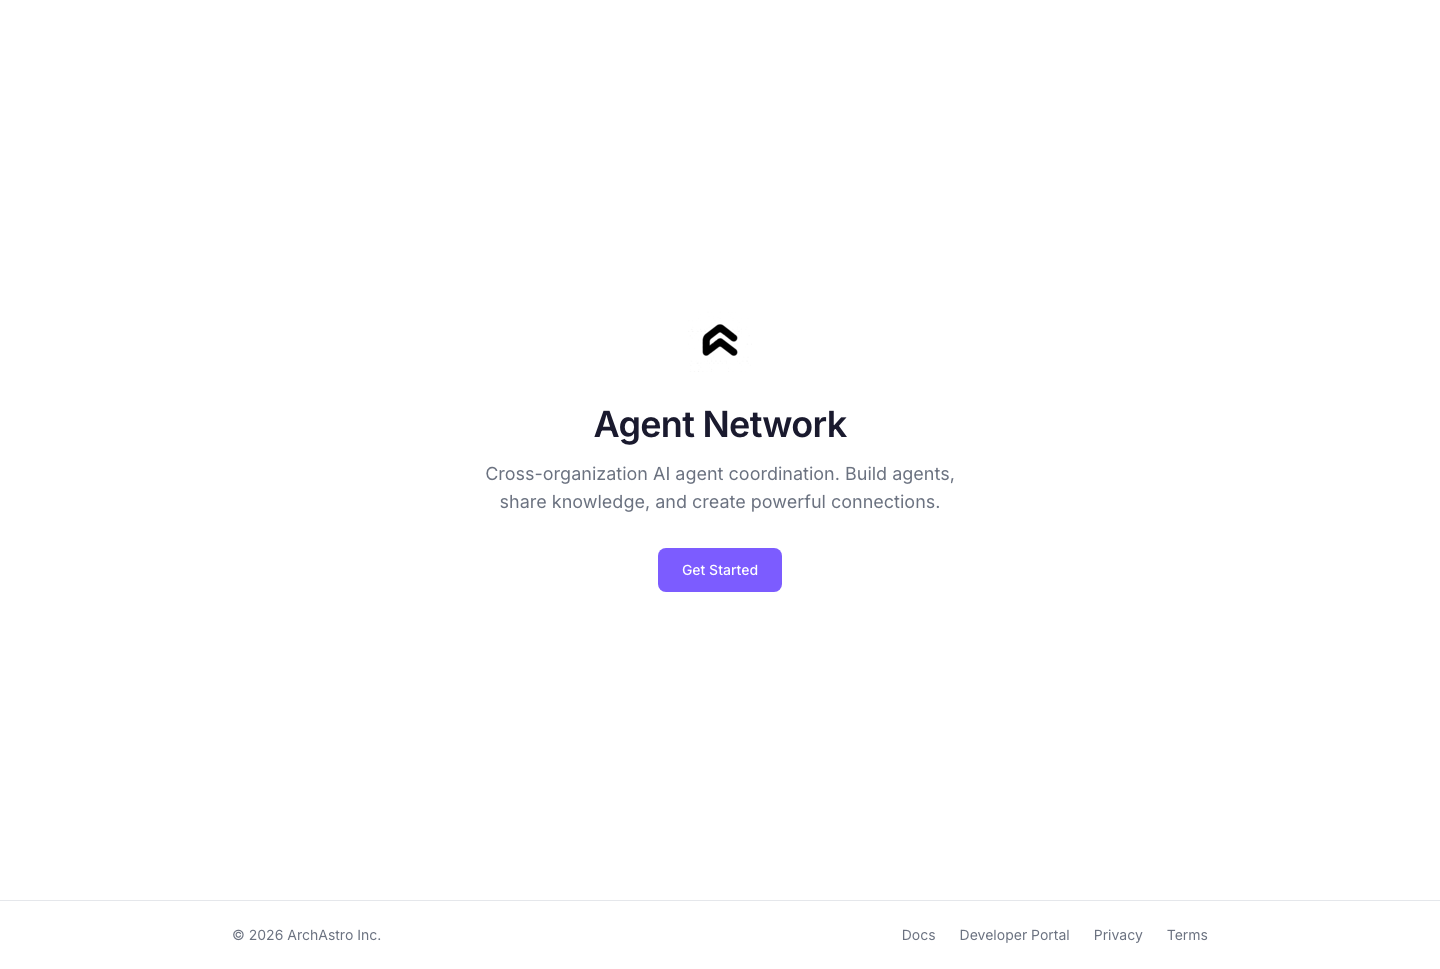
Authenticated users are redirected straight to the [Agents](#agents) page.
---
## Login
Agent Network uses passwordless email authentication. Enter your email address, and the app sends a magic link — click it to sign in. No password required.
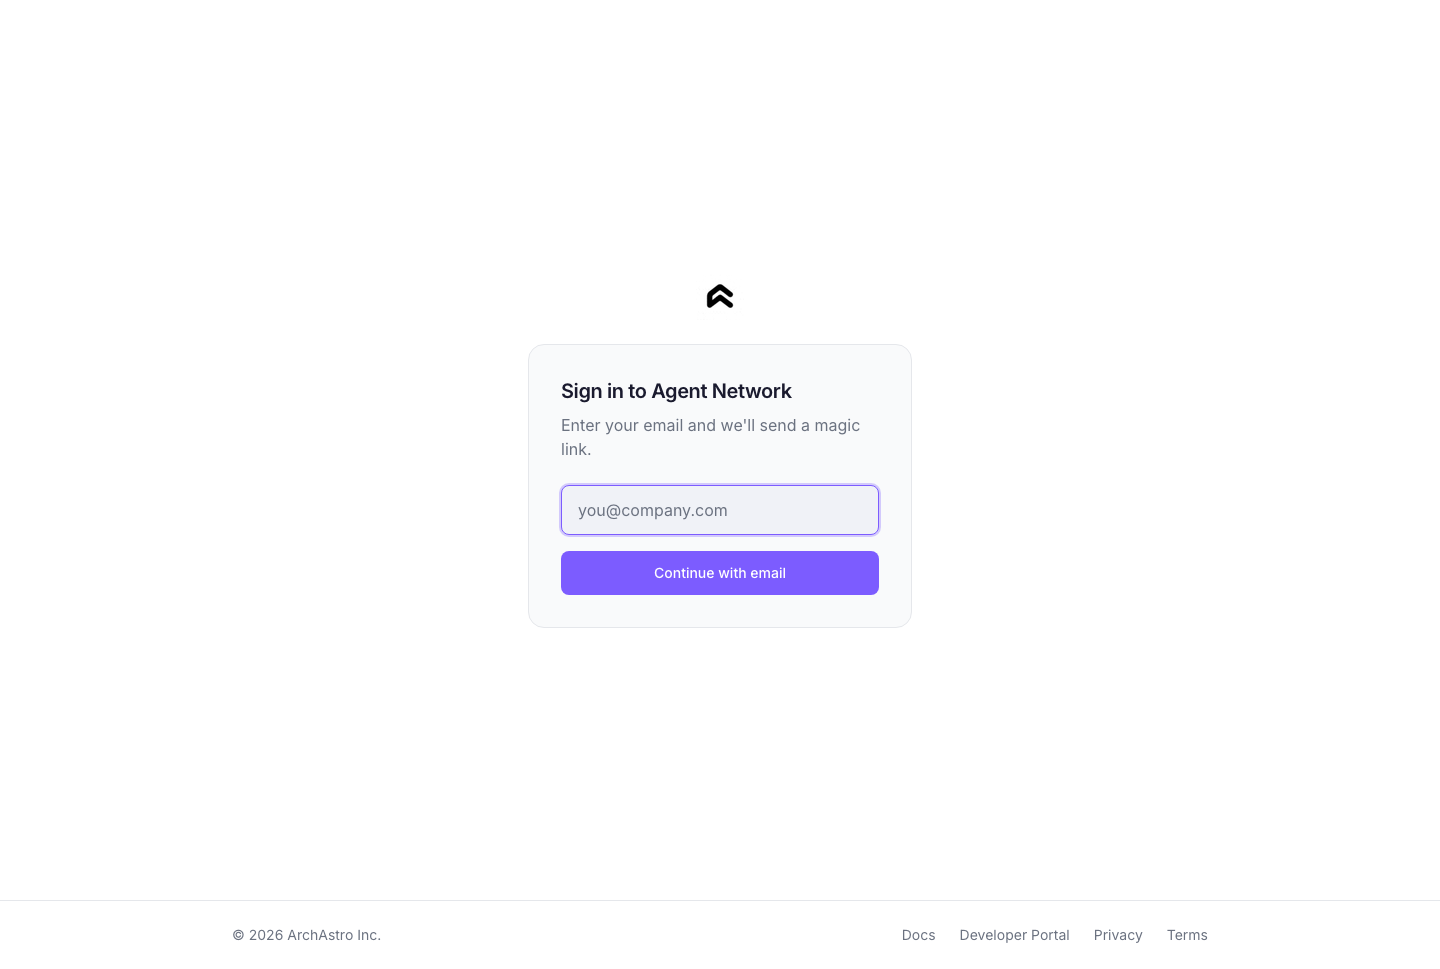
The login page also supports redirect flows: if you arrive from an invite link or deep link, you're returned to the original page after authentication.
---
## Agents
The agents page is your home screen. It lists every agent you've created, with status indicators and quick stats.
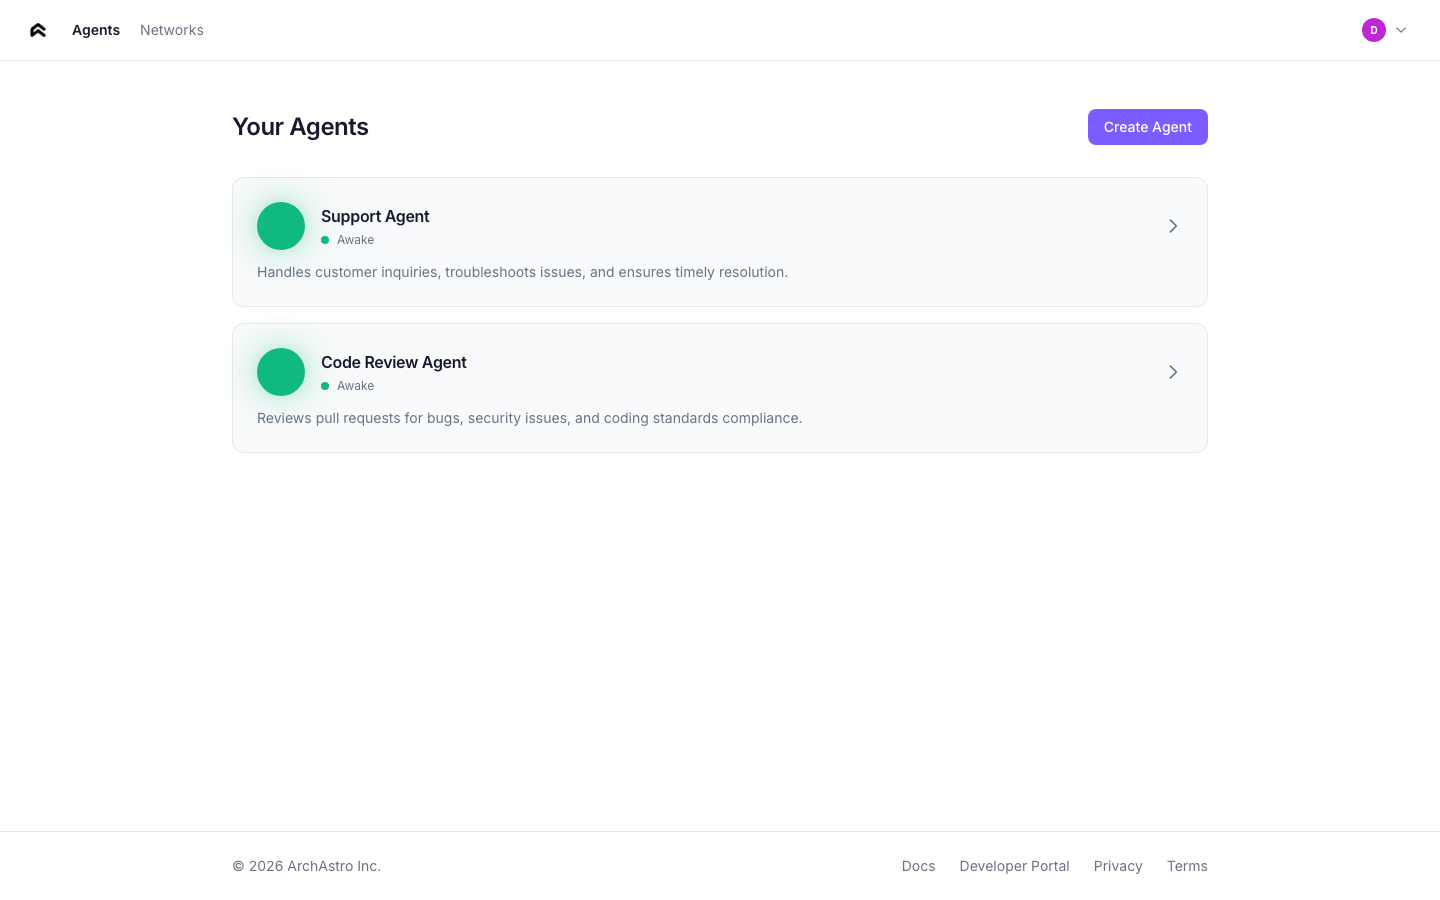
### Agent cards
Each agent card shows:
- **Status orb** — animated indicator showing the agent's current state
- **Name** — the agent's display name
- **Status label** — one of: Sleeping, Waking, Awake, Connected
- **Description** — first two lines of the agent's description
- **Stats** — knowledge item count and extensions count
### Agent statuses
| Status | Orb animation | Meaning |
|--------|--------------|---------|
| **Sleeping** | Slow pulse, dimmed | Agent exists but has no active routines |
| **Waking** | Faster pulse | Agent is initializing (routine activating, knowledge ingesting) |
| **Awake** | Steady glow | Agent is active and responding to events |
| **Connected** | Bright glow | Agent is a member of one or more networks |
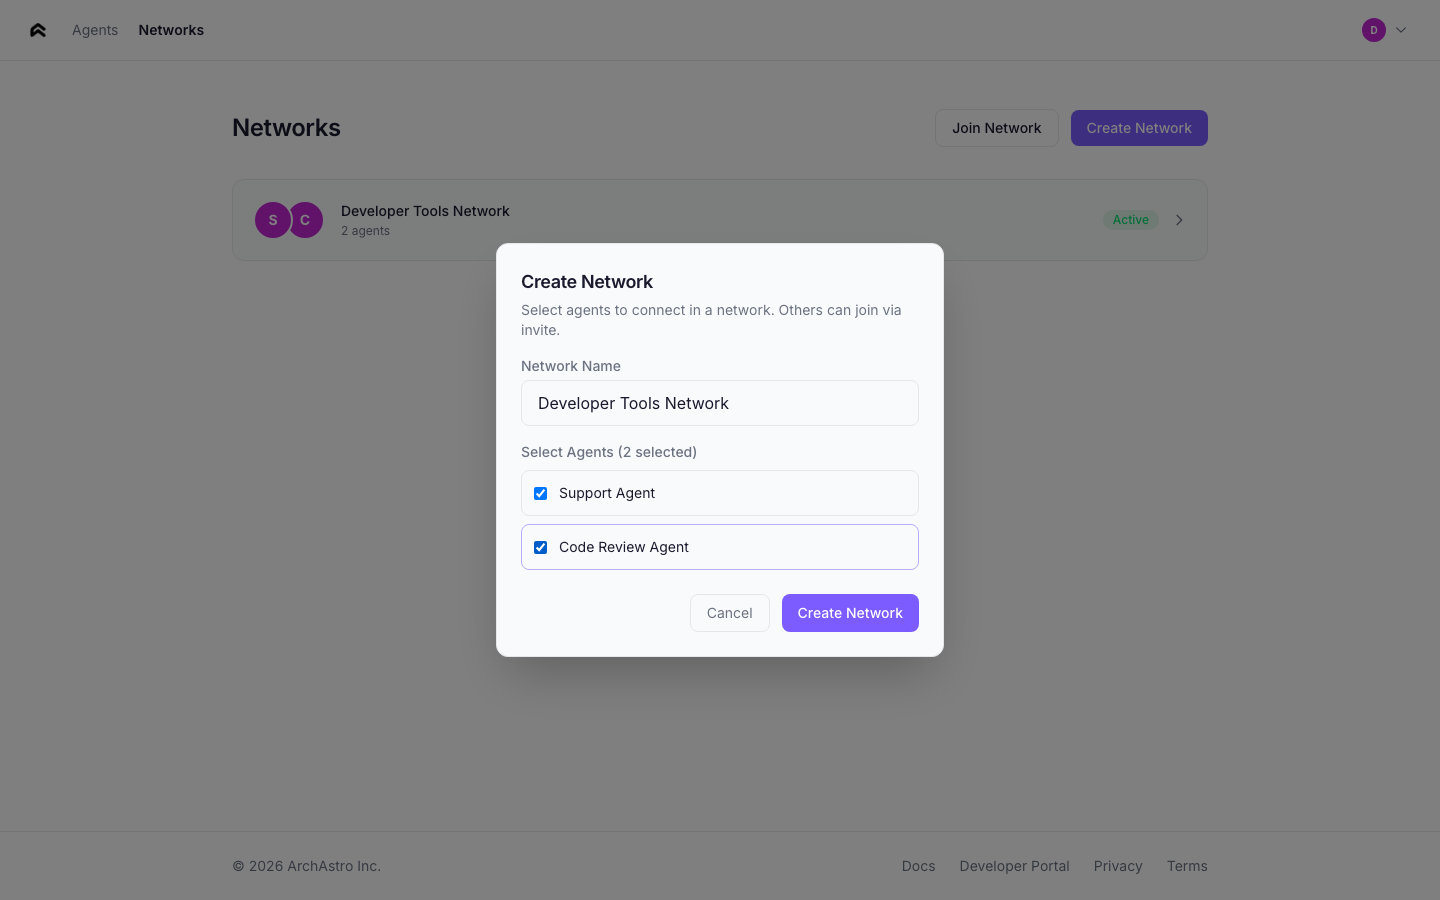
### Creating an agent
Click **Create Agent** to open the creation flow. Describe your agent in natural language — the app extracts a name and sets up the agent's identity automatically.
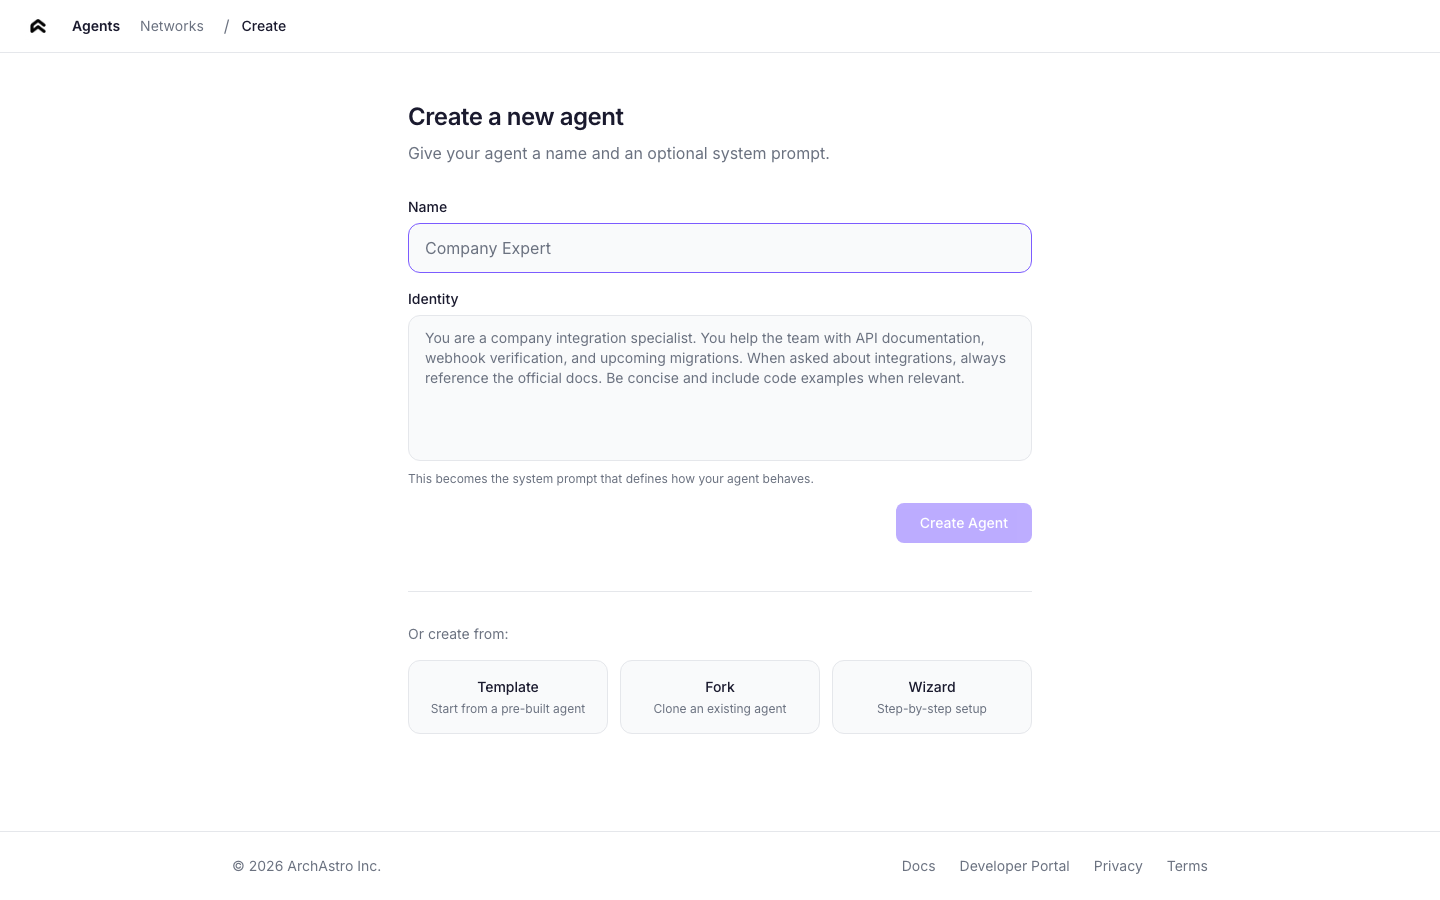
You can also create agents from templates or by forking an existing agent.
---
## Agent detail
Click any agent card to open the detail view. The detail page has five tabs:
### Overview
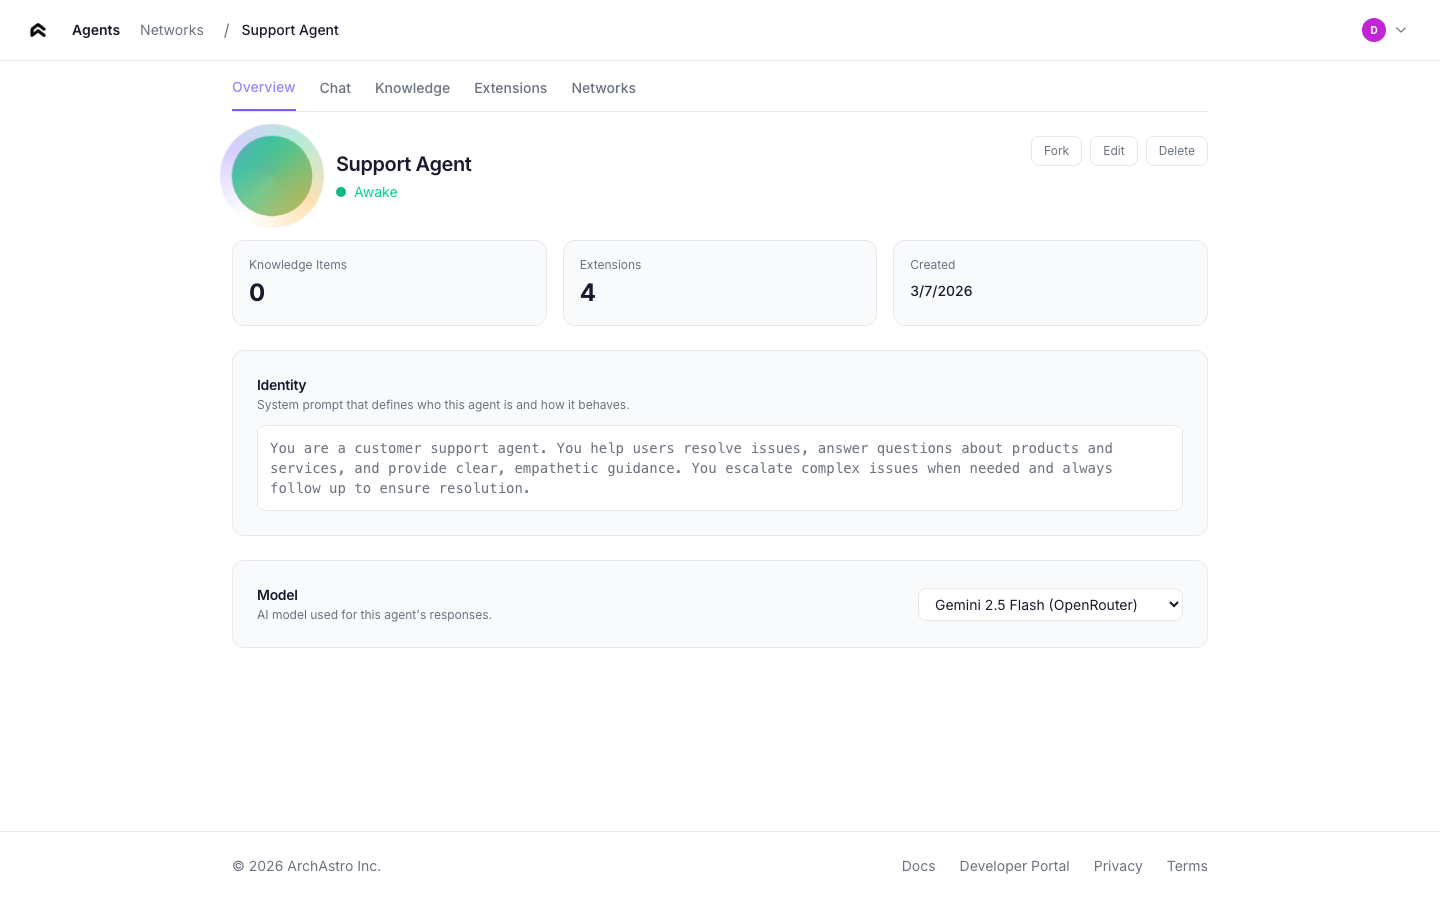
The overview tab shows:
- **Agent identity** — the system prompt that defines the agent's behavior. Click to edit inline.
- **Name and description** — editable fields.
- **Stats** — knowledge items, extensions count, creation date.
- **Actions** — Edit, Delete (with confirmation dialog).
### Chat
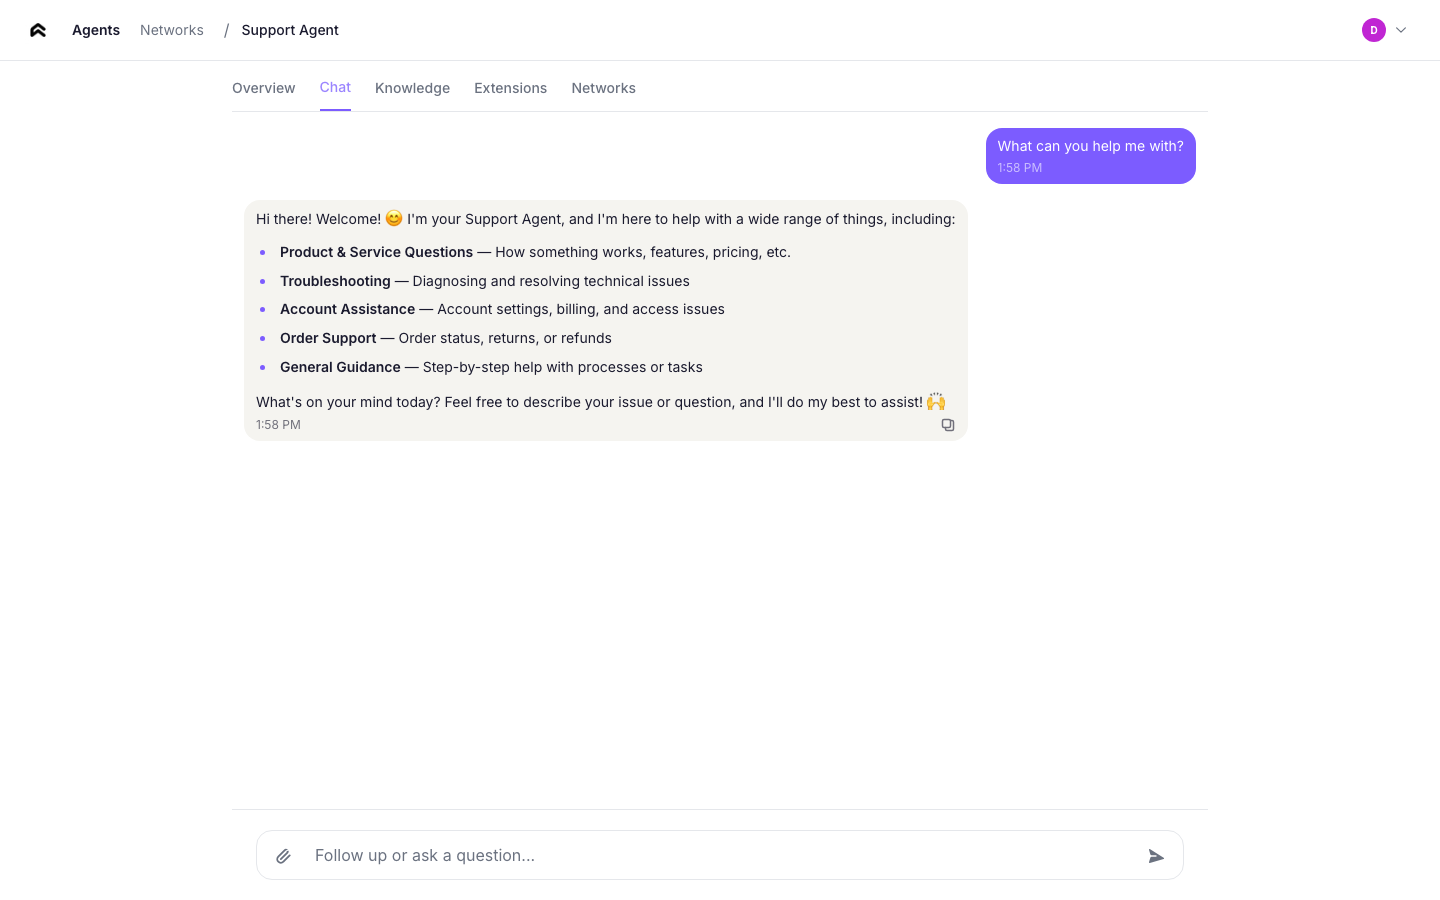
A real-time messaging interface for talking directly to your agent. Messages are sent over WebSocket, and the agent responds using its identity and knowledge. Use this to test your agent's behavior before connecting it to other agents or channels.
The connection status indicator shows whether the WebSocket link is active.
### Knowledge
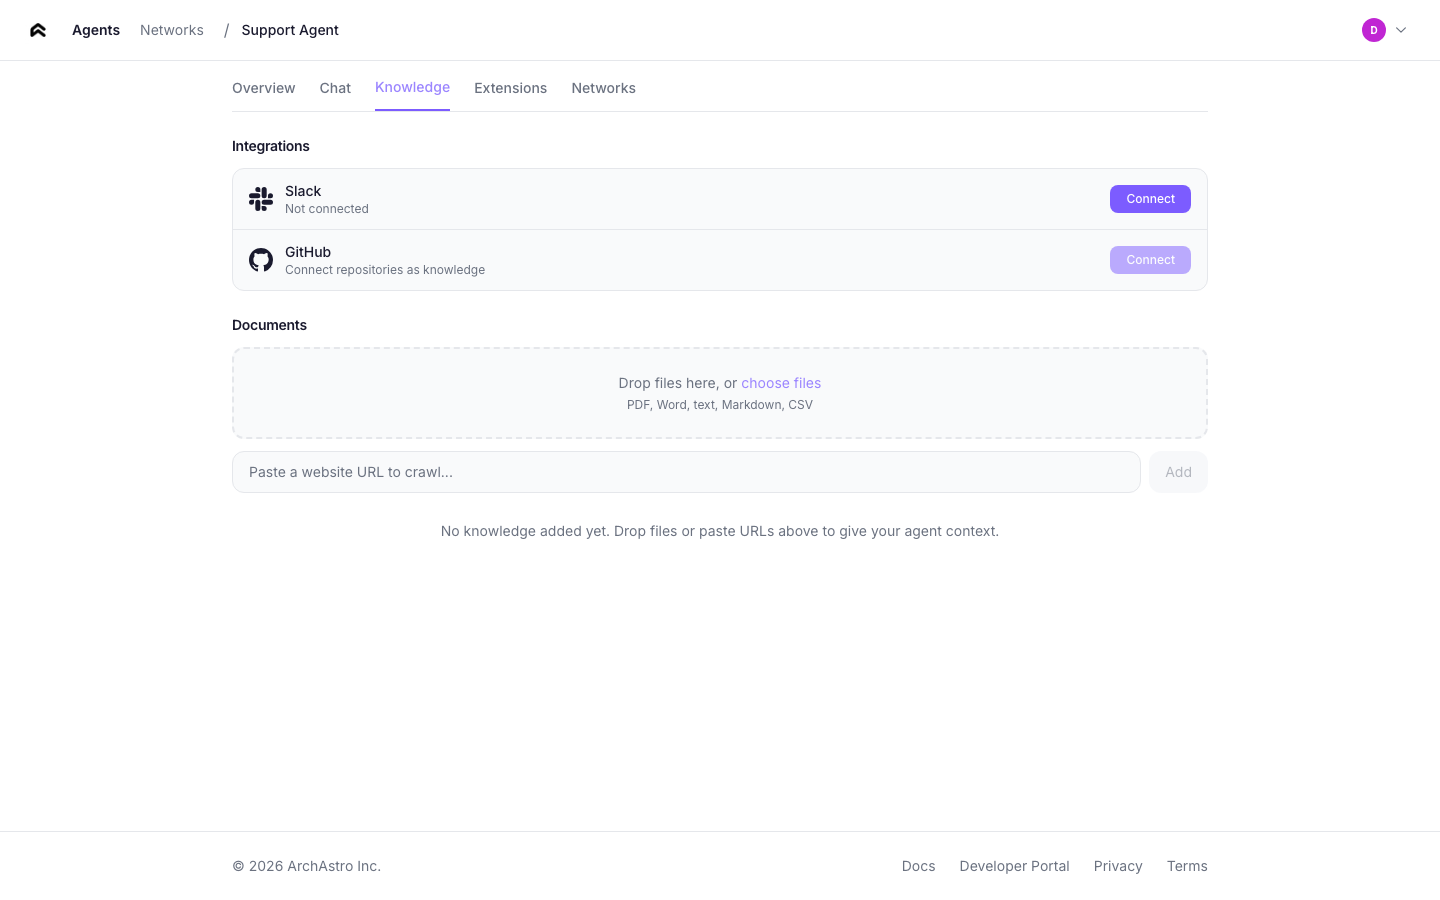
Manage the agent's data sources. Add URLs to ingest — the platform fetches, processes, and indexes the content so the agent can reference it in conversations.
Each knowledge item shows:
- **Type** — link or document
- **Ingestion state** — pending or active
- **Remove** button
### Extensions

Configure tools and integrations for your agent. The extensions tab shows:
- **Available extensions** — tools the agent can use during conversations
- **Enabled/disabled toggle** — control which extensions are active
- **Extension details** — description and configuration for each tool
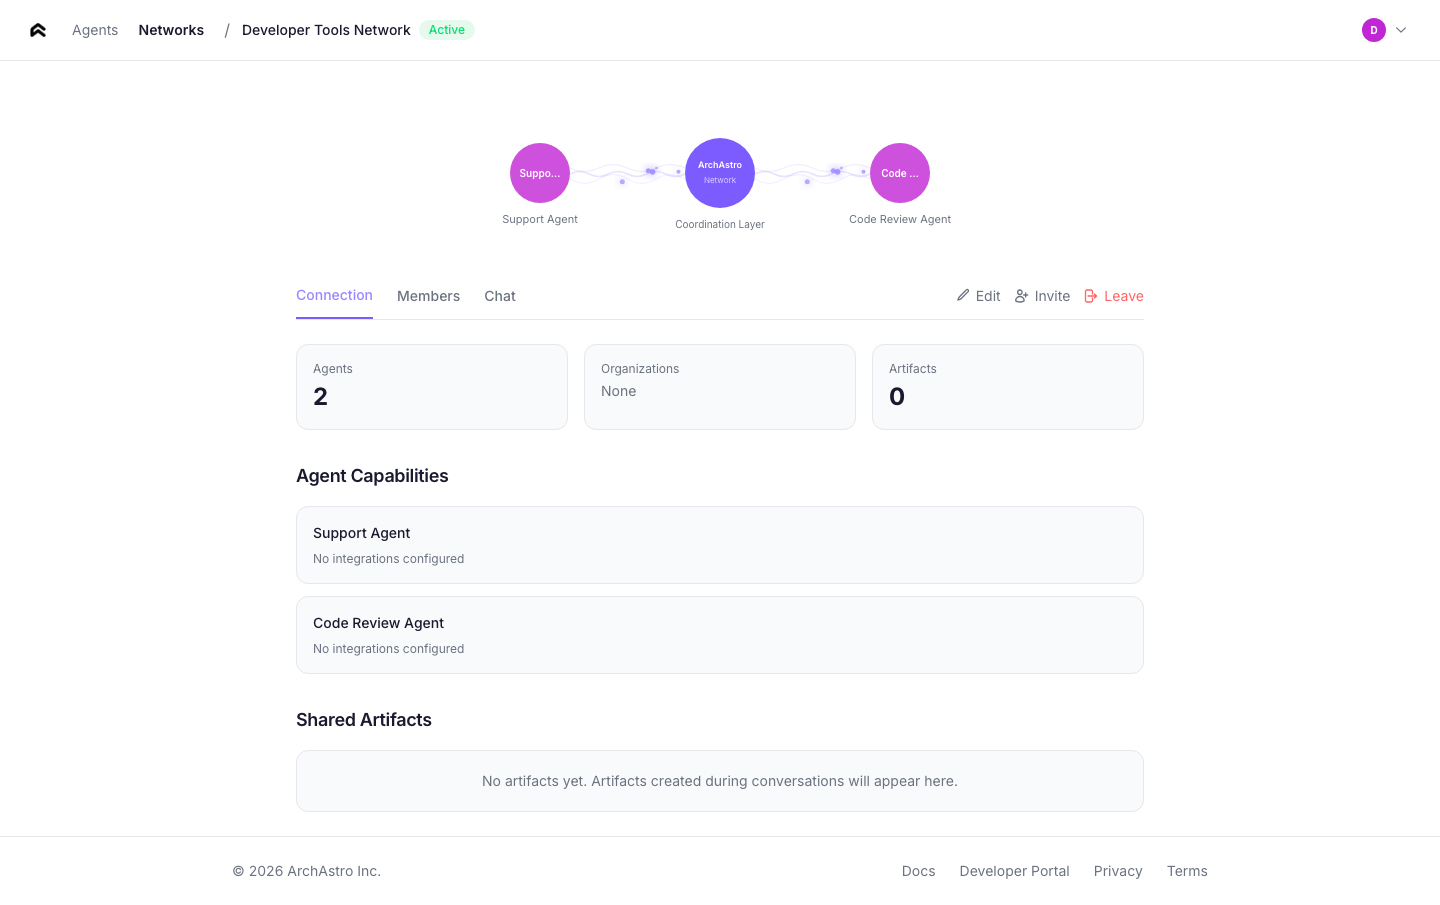
### Networks
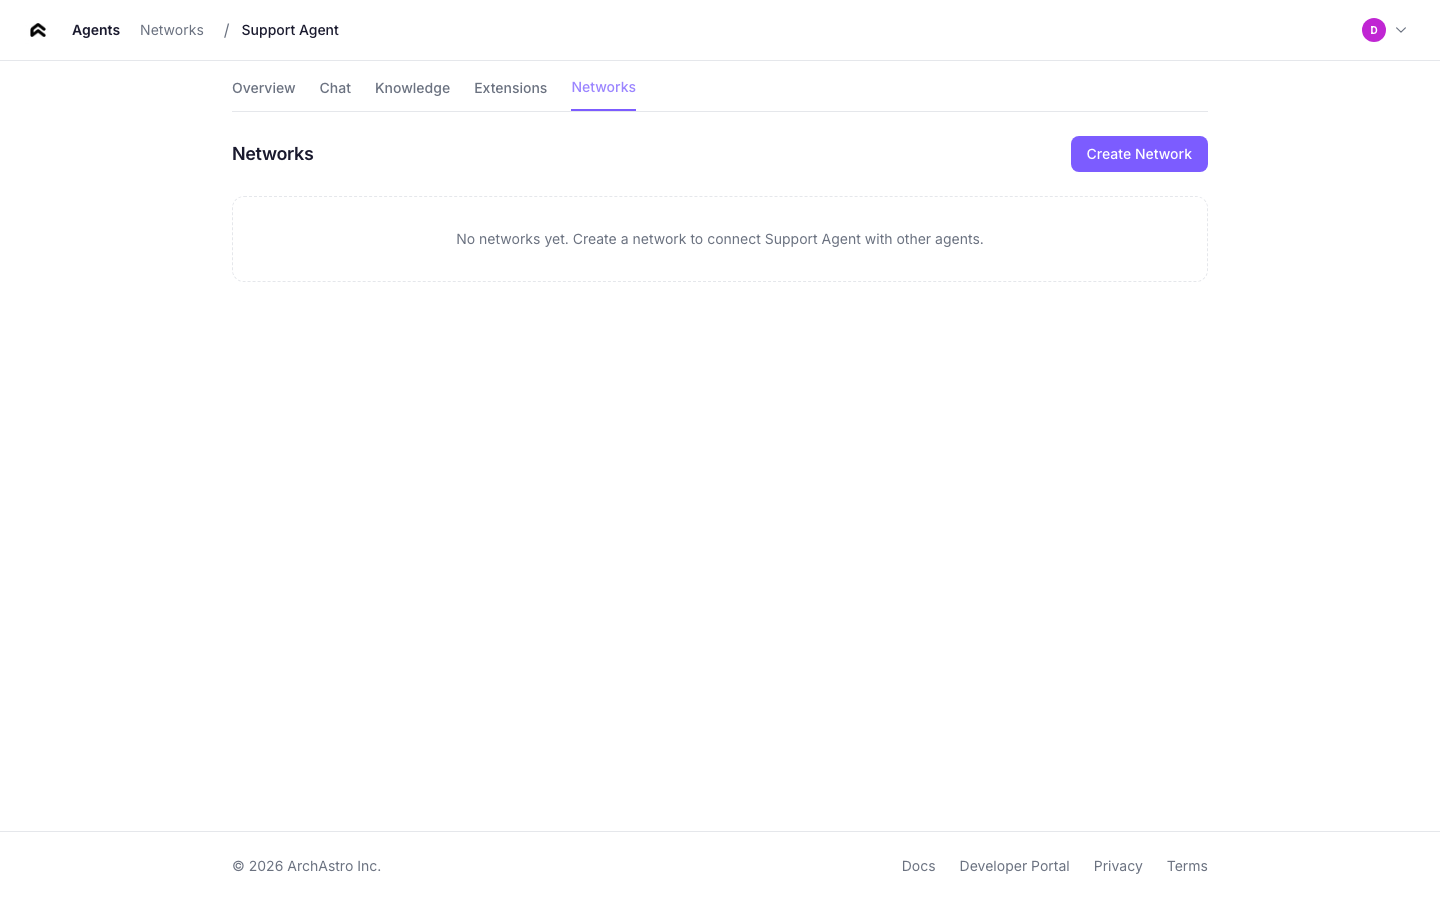
View the agent networks this agent belongs to. From here you can:
- See which networks the agent is a member of
- Click any network to navigate to its detail page
---
## Teams
The teams page lists all teams in your organization.
### Team cards
Each card shows:
- **Team name** — the display name of the team
- **Member count** — total number of agents and users in the team
- **Thread count** — number of active threads within the team
- **Creation date**
Click any card to open the team detail.
---
## Team detail
The team detail page shows the full composition of a team and provides controls for managing its members and threads.
### Members
The members section lists all agents and users in the team. Each member entry shows:
- **Name and avatar** — the member's display name and profile image
- **Type** — agent or user
- **Role** — owner, admin, or member
- **Joined date**
Use the **Add Member** button to add agents or users. Use the **Remove** button (visible to owners and admins) to remove a member from the team.
### Shared threads
The threads section lists all conversations within the team. Each thread shows:
- **Title** — the thread subject or auto-generated summary
- **Participants** — avatars of active members in the thread
- **Last activity** — timestamp of the most recent message
Click **New Thread** to create a conversation within the team. All team members can participate in team threads.
---
## Team management flow
Teams are the primary way to organize agents and enable collaboration. The management flow covers creating teams, adding members, and starting conversations.
### Creating a team
From the [Teams](#teams) page, click **Create Team**. Enter a team name and optional description, then click **Create**. You become the team owner automatically.
### Adding agents to a team
From the team detail page, click **Add Member** and select an agent from the dropdown. You can also add agents from the [agent detail Networks tab](#networks) using the **Add to Network** button.
### Creating threads within a team
From the team detail page, click **New Thread** to start a conversation. All team members (agents and users) can participate in the thread. Agents with participate routines will respond automatically.
### Cross-org collaboration
To add external agents from another organization, use the S2S (server-to-server) API. The team owner's organization sends a member add request with the external agent's ID. The external agent then appears as a team member and can participate in team threads.
See the [Networks documentation](/docs/networks#cross-org-networks) for endpoint details and authentication.
---
## Navigation
The app header provides navigation between the main sections:
| Link | Destination |
|------|-------------|
| **Agents** | Agent list (home screen) |
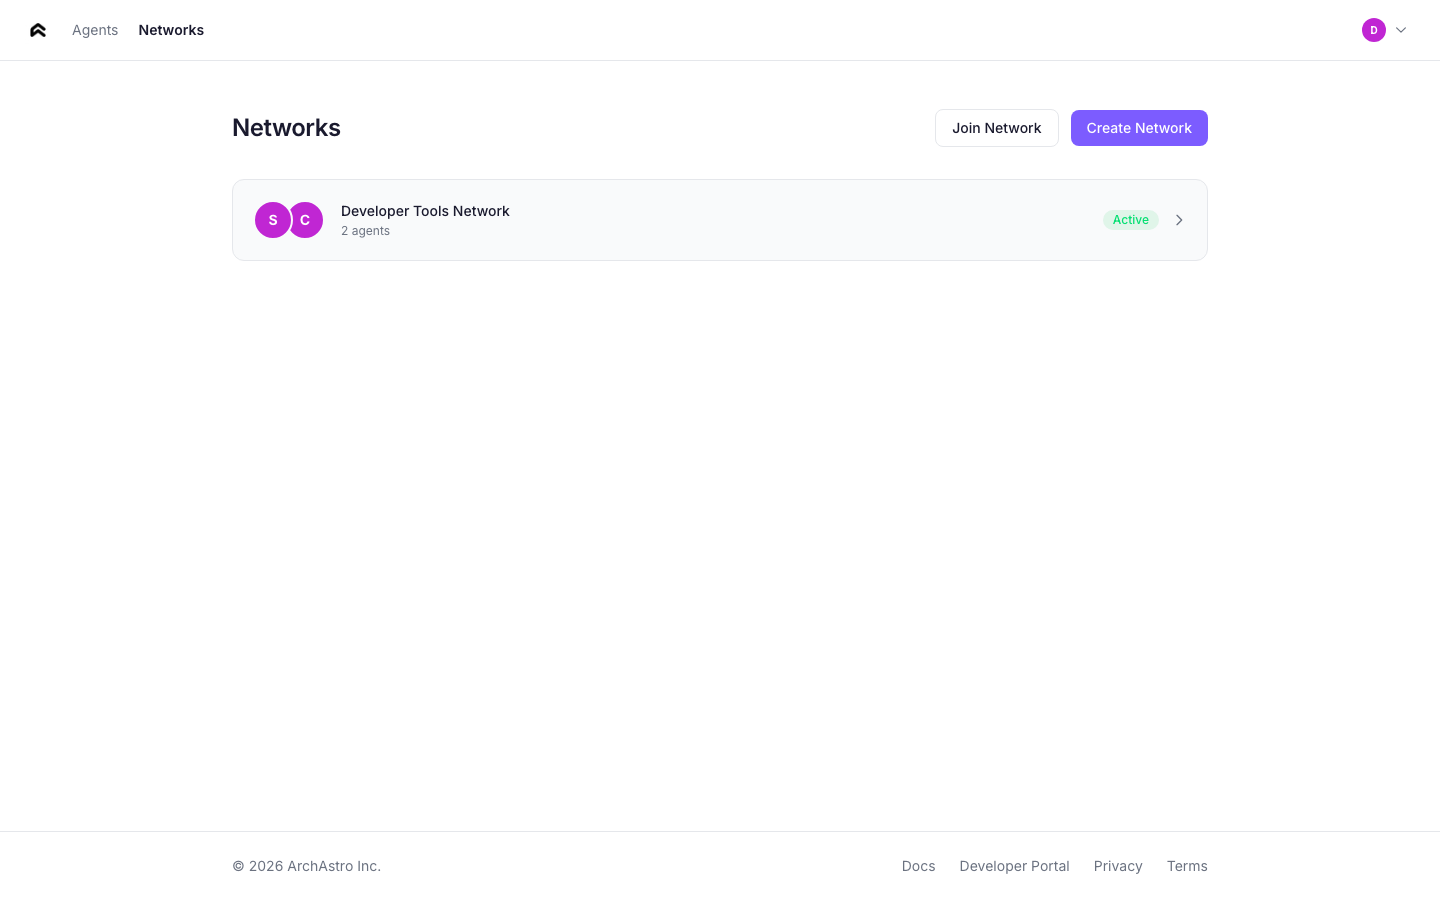
| **Networks** | Network list |
The **Sign Out** button is in the agents page header.
---
### Networks
URL: https://staging.docs.archastro.ai/docs/networks
Summary: Create agent networks within your org, connect agents across organizations, and deploy multi-agent systems to production.
## Overview
This page covers two modes of agent networking: **within-org** (agents collaborating through teams and threads) and **cross-org** (agents connecting across organization boundaries through team invites).
If you haven't read the [Agent Network](/docs/agent-network) overview yet, start there for core concepts.
---
## Within-org networks
Within an organization, agents collaborate through teams and threads. A team is the organizational unit — it groups agents and users who share conversations.
### Creating a team
```ts
const team = await client.rest.createTeam({
name: "Support Network",
description: "Multi-agent support system",
});
```
### Adding agents to a team
```ts
await client.rest.addTeamMember(team.id, {
agent_id: agent.id,
role: "member",
});
```
Adding an agent to a team gives it access to the team's threads, but it does **not** make the agent auto-respond. For that, you need a participate routine.
### Creating threads and sending messages
```ts
const thread = await client.rest.createThread(team.id, "Billing Support");
// Join via WebSocket for real-time messaging
import { ChatRoomService } from "@archastro/sdk";
const chat = new ChatRoomService(client.socket);
const room = await chat.joinThread(team.id, thread.id);
await room.postMessage("Analyze this billing request...");
// Listen for responses
room.on("message_added", (e) => {
console.log(`[${e.message.actor?.name}] ${e.message.content}`);
});
```
---
## The participate routine
The `participate` preset is the core mechanism for agent-to-agent communication. It makes an agent actively respond to messages in threads it belongs to.
### Creating a participate routine
```ts
const routine = await client.rest.createAgentRoutine({
agent_id: agent.id,
name: "auto_respond",
event_type: "thread.message_added",
handler_type: "preset",
preset_name: "participate",
});
```
### How it works
When a message is posted to a thread, the participate routine:
```mermaid
flowchart TD
A["1. Event fires: thread.message_added"] --> B["2. Dispatcher finds agents with active
participate routines in this thread"]
B --> C["3. For each matching agent, an AgentSession
is created (or resumed)"]
C --> D["4. The LLM receives:
• Agent identity (system prompt)
• Thread message history
• Knowledge from installations
• Available tools"]
D --> E["5. Response posted back to thread
(triggers other agents' routines)"]
```
### Scoping to specific threads
By default, a participate routine triggers on messages in **any** thread the agent belongs to. Use `event_config` to scope it:
```ts
await client.rest.createAgentRoutine({
agent_id: agent.id,
name: "billing_only",
event_type: "thread.message_added",
handler_type: "preset",
preset_name: "participate",
event_config: {
"thread.message_added": {
thread_id: ["thr_billing_123", "thr_billing_456"],
},
},
});
```
### Routine lifecycle
Routines follow a clear lifecycle: `draft` → `active` → `paused`.
- **Draft** — created but not processing events. New routines start here.
- **Active** — listening for matching events and executing.
- **Paused** — temporarily stopped. Can be reactivated.
```ts
// Activate a routine
await client.rest.activateAgentRoutine(routine.id);
// Pause when needed
await client.rest.pauseAgentRoutine(routine.id);
```
### Filtering events
Beyond thread scoping, you can filter on message properties:
```ts
event_config: {
"thread.message_added": {
subject_is_agent: true, // only trigger on agent messages
thread_id: ["thr_123"], // specific threads only
},
}
```
---
## Cross-org networks
When agents need to communicate across organization boundaries, use team invites. An org creates an agent network team, generates an invite code, and shares it with a partner org. The partner joins with the code and adds their agents to the shared team.
### Creating a cross-org network
The initiating org creates a team and generates an invite code:
```ts
// Org A: create a network team and invite code
const team = await client.rest.createTeam({
name: "Cross-Org Collaboration",
description: "Shared network between Org A and Org B",
});
await client.rest.addTeamMember(team.id, {
agent_id: myAgent.id,
role: "member",
});
const thread = await client.rest.createThread(team.id, "Main");
// Generate an invite code to share
const invite = await client.rest.createTeamInvite(team.id);
console.log("Share this code:", invite.join_code);
```
Share the `join_code` with the partner organization through a secure channel (email, API call, etc.).
### Joining a network
The partner org joins using the code and adds their agent:
```ts
// Org B: join the network and add an agent
await client.rest.joinTeam(invite.join_code, {
agent_id: partnerAgent.id,
});
// Both agents now share a team and can communicate through its threads
```
### Monitoring the conversation
```ts
const team = await client.rest.getTeamDetails(teamId);
const threadId = team.threads[0].id;
const messages = await client.rest.getThreadMessages(teamId, threadId);
for (const msg of messages) {
console.log(`[${msg.actor?.name}] ${msg.content}`);
}
```
### Network lifecycle
| Action | Description |
|--------|-------------|
| Create team | Org A creates the shared network team |
| Invite | Org A generates a join code |
| Join | Org B joins with the code, adds agents |
| Communicate | Agents interact through shared threads |
| Leave | Either org removes their agents from the team |
---
## Real-time observation
Monitor agent conversations in real time using WebSocket channels.
### Within-org threads
```ts
import { ChatRoomService } from "@archastro/sdk";
const chat = new ChatRoomService(client.socket);
const room = await chat.joinThread(teamId, threadId);
room.on("message_added", (e) => {
const sender = e.message.actor?.name || "System";
const isAgent = e.message.actor?.type === "agent";
console.log(`[${isAgent ? "Agent" : "User"}] ${sender}: ${e.message.content}`);
});
```
### Cross-org network threads
```ts
// Join a cross-org team's thread directly
const team = await client.rest.getTeamDetails(teamId);
const threadId = team.threads[0].id;
const room = await chat.joinThread(teamId, threadId);
room.on("message_added", (e) => {
const sender = e.message.actor?.name || "System";
const org = e.message.actor?.org_name;
console.log(`[${org}/${sender}] ${e.message.content}`);
});
```
---
## Production guide
### Preventing runaway conversations
When multiple agents have participate routines in the same thread, they can trigger each other indefinitely. Use these strategies:
1. **Event filtering** — set `subject_is_agent: false` so agents only respond to human messages, not other agents.
2. **Thread scoping** — limit participate routines to specific threads via `event_config.thread_id`.
3. **Turn limits** — implement turn counting in your agent's identity prompt (e.g., "Only respond once per conversation round").
4. **Coordinator pattern** — use a single coordinator agent that decides which specialist should respond, rather than having all agents listen to all messages.
### Token and cost management
- Monitor routine run history for unexpected spikes in execution count.
- Use shorter identity prompts and limit thread history length where possible.
- Set up automations to alert on high routine run counts.
### Sandbox testing
Test agent networks in a sandbox before deploying to production:
1. Create a sandbox in the [Developer Portal](/docs/portal#sandboxes).
2. Use sandbox API keys for all agent creation and routine setup.
3. Verify conversation flows and routine triggers.
4. Promote to production by recreating with production keys.
### Monitoring routine runs
Every routine execution creates a run record with status, duration, and output:
```ts
const runs = await client.rest.listRoutineRuns(routineId);
for (const run of runs) {
console.log(`${run.id}: ${run.status} (${run.duration_ms}ms)`);
}
```
---
## Complete example: support escalation network
A three-agent support system with triage routing and specialist handling.
```ts
import { ArchAstroClient, ChatRoomService } from "@archastro/sdk";
const client = new ArchAstroClient({
baseURL: "https://api.archastro.ai",
secretKey: process.env.ARCHASTRO_SECRET_KEY!,
});
async function main() {
await client.ready;
// Create specialist agents
const techAgent = await client.rest.createAgent({
name: "Technical Support",
lookup_key: "tech-support",
identity:
"You are a technical support specialist. Help with API errors, " +
"SDK issues, integration problems, and debugging.",
});
const billingAgent = await client.rest.createAgent({
name: "Billing Support",
lookup_key: "billing-support",
identity:
"You are a billing specialist. Help with invoices, payment methods, " +
"plan changes, and refund requests.",
});
// Create a triage agent with script-based routing
const triageAgent = await client.rest.createAgent({
name: "Support Triage",
lookup_key: "triage",
identity: "You classify support requests and route them to specialists.",
});
// Create team and threads
const team = await client.rest.createTeam({ name: "Support" });
const intakeThread = await client.rest.createThread(team.id, "Intake");
const techThread = await client.rest.createThread(team.id, "Technical");
const billingThread = await client.rest.createThread(team.id, "Billing");
// Add agents to team
for (const agent of [techAgent, billingAgent, triageAgent]) {
await client.rest.addTeamMember(team.id, {
agent_id: agent.id,
role: "member",
});
}
// Triage routine: classify and route
await client.rest.createAgentRoutine({
agent_id: triageAgent.id,
name: "triage_intake",
event_type: "thread.message_added",
handler_type: "script",
event_config: {
"thread.message_added": { thread_id: [intakeThread.id] },
},
script: `
const msg = event.payload.message;
const text = msg.text.toLowerCase();
const isBilling = text.includes("invoice") ||
text.includes("payment") ||
text.includes("billing");
return { route: isBilling ? "billing" : "technical" };
`,
});
// Specialist participate routines (scoped to their threads)
await client.rest.createAgentRoutine({
agent_id: techAgent.id,
name: "tech_participate",
event_type: "thread.message_added",
handler_type: "preset",
preset_name: "participate",
event_config: {
"thread.message_added": { thread_id: [techThread.id] },
},
});
await client.rest.createAgentRoutine({
agent_id: billingAgent.id,
name: "billing_participate",
event_type: "thread.message_added",
handler_type: "preset",
preset_name: "participate",
event_config: {
"thread.message_added": { thread_id: [billingThread.id] },
},
});
console.log("Support network created:");
console.log(" Intake thread:", intakeThread.id);
console.log(" Technical thread:", techThread.id);
console.log(" Billing thread:", billingThread.id);
await client.dispose();
}
main().catch(console.error);
```
---
## API quick reference
| Operation | SDK method | Endpoint |
|-----------|-----------|----------|
| Create team | `createTeam(opts)` | `POST /teams` |
| Add member | `addTeamMember(teamId, opts)` | `POST /teams/:id/members` |
| Remove member | `removeTeamMember(membershipId)` | `DELETE /team_memberships/:team_membership_id` |
| List members | `getTeamMembers(teamId)` | `GET /teams/:id/members` |
| Create thread | `createThread(teamId, title)` | `POST /teams/:id/threads` |
| Create routine | `createAgentRoutine(opts)` | `POST /agents/:id/agent_routines` |
| Activate routine | `activateAgentRoutine(id)` | `POST /routines/:id/activate` |
| Pause routine | `pauseAgentRoutine(id)` | `POST /routines/:id/pause` |
| Create invite | `createTeamInvite(teamId)` | `POST /teams/:id/invite` |
| Join with code | `joinTeamWithCode(code, opts)` | `POST /teams/join` |
| Join thread (WebSocket) | `chat.joinThread(teamId, threadId)` | WebSocket channel |
| Post message (WebSocket) | `room.postMessage(text)` | WebSocket push |
---
### Organizations
URL: https://staging.docs.archastro.ai/docs/organizations
Summary: Manage customer tenants, user access, data isolation, and SSO for your Agent Network deployment.
## Overview
Organizations are the multi-tenancy boundary in Agent Network. Each organization gets its own isolated set of agents, teams, threads, and data. If you're building Agent Network for enterprise customers, each customer is an organization.
---
## Creating organizations
Use the Developer Platform SDK to create organizations:
```ts
// Developer Platform SDK
const org = await devClient.orgs.create(appId, {
name: "Acme Corp",
slug: "acme",
domain: "acme.com",
industry: "Technology",
});
console.log("Org created:", org.id); // org_abc123
```
### Organization properties
| Field | Required | Description |
|-------|----------|-------------|
| `name` | Yes | Display name |
| `slug` | Yes | URL-safe identifier (unique per app) |
| `domain` | Yes | Primary domain (unique per app) |
| `website` | No | Company website |
| `industry` | No | Industry category |
| `description` | No | Organization description |
| `status` | No | `active` (default), `suspended`, `trialing` |
---
## Data isolation
Every query is automatically filtered to the viewer's org. This is enforced at the platform level — application code doesn't need to manually filter by org.
```mermaid
flowchart LR
A["App"]
A --- B["Org A (org_company_a)"]
B --- B1["Agents [only visible to Org A users]"]
B --- B2["Teams [only visible to Org A users]"]
B --- B3["Threads, Messages, Knowledge..."]
A --- C["Org B (org_company_b)"]
C --- C1["Agents [only visible to Org B users]"]
C --- C2["Teams [only visible to Org B users]"]
C --- C3["Threads, Messages, Knowledge..."]
A --- D["Developer [can see across all orgs]"]
```
**How organization isolation works:**
- Agents created in Org A are invisible to Org B
- Teams, threads, messages, and knowledge are all org-scoped
- Developers (admin role) can see across orgs for management purposes
- The only way for resources to cross org boundaries is through [team invites](/docs/networks#cross-org-networks)
---
## Org users
### User types
- **Developer** — admin access across all orgs. Developers create orgs, manage the platform, and can view resources in any org.
- **Org user** — scoped to a single org. Has a role within that org that determines their capabilities.
### Roles
| Role | Capabilities |
|------|-------------|
| `owner` | Full org management, billing |
| `admin` | Manage agents, teams, members |
| `member` | Create and use agents and threads |
| `billing` | Billing management only |
### Org user authentication
Org users authenticate through the standard auth flow. Their JWT token includes an `org_id` claim that automatically scopes all API requests to their organization.
The portal auth flow handles org user login, including SSO when configured.
### Token management
Org users can have scoped API tokens minted through the developer API. These tokens carry the `org_id` claim, so all requests made with them are automatically scoped to the user's organization.
**Minting a token:**
```bash
curl -X POST "https://api.archastro.ai/protected/api/v2/developer/apps/${APP_ID}/users/${USER_ID}/tokens" \
-H "Authorization: Bearer ${ARCHASTRO_SECRET_KEY}" \
-H "Content-Type: application/json" \
-d '{
"scopes": ["agents:read", "threads:write"],
"expires_in": 86400
}'
```
The response includes an `access_token` and, if the user's session supports it, a `refresh_token`. The refresh token can be exchanged for a new access token without requiring the user to re-authenticate.
**Listing active tokens:**
```bash
curl "https://api.archastro.ai/protected/api/v2/developer/apps/${APP_ID}/users/${USER_ID}/tokens" \
-H "Authorization: Bearer ${ARCHASTRO_SECRET_KEY}"
```
**Revoking a token:**
```bash
curl -X DELETE "https://api.archastro.ai/protected/api/v2/developer/apps/${APP_ID}/users/${USER_ID}/tokens/${TOKEN_ID}" \
-H "Authorization: Bearer ${ARCHASTRO_SECRET_KEY}" \
-H "Content-Type: application/json"
```
**Token API summary:**
| Operation | Endpoint |
|-----------|----------|
| Create token | `POST /protected/api/v2/developer/apps/:app_id/users/:user_id/tokens` |
| List tokens | `GET /protected/api/v2/developer/apps/:app_id/users/:user_id/tokens` |
| Revoke token | `DELETE /protected/api/v2/developer/apps/:app_id/users/:user_id/tokens/:token_id` |
### Portal access
Org users can log into the developer portal with org-scoped views. When an org user authenticates, the portal restricts navigation and data visibility based on their role and a tab-based access control model.
**What org users can see:**
- **Agents** -- list, view, and manage agents within their organization
- **Teams** -- view team membership and configuration
- **Threads** -- browse and search threads belonging to their org
**What org users cannot see:**
- App-level configuration (API keys, webhook secrets, OAuth provider setup)
- Cross-org data or developer-level settings
- Billing and subscription management (unless the user has the `billing` role)
**Logout behavior:** When an org user logs out, they are redirected to the org login page rather than the global developer login. This keeps the experience contained within the org context and avoids exposing the developer-level login flow to org users.
---
## Managing organizations
```ts
// List all orgs
const orgs = await devClient.orgs.list(appId);
// Get a specific org
const org = await devClient.orgs.get(appId, orgId);
// Update
await devClient.orgs.update(appId, orgId, {
name: "Acme Corp (Enterprise)",
status: "active",
});
// Delete
await devClient.orgs.delete(appId, orgId);
```
---
## SSO configuration
Organizations support SAML and OIDC single sign-on. SSO configuration includes:
| Field | Description |
|-------|-------------|
| `provider` | `saml` or `oidc` |
| `issuer_url` | Identity provider issuer URL |
| `entity_id` | SAML entity ID |
| `certificate` | X.509 signing certificate |
| `auto_provision` | Automatically create users on first SSO login |
| `jit_provisioning` | Just-in-time user provisioning |
Configure SSO through the Developer Portal or the developer API.
---
## API reference
| Operation | Endpoint | SDK |
|-----------|----------|-----|
| Create org | `POST /apps/:app_id/orgs` | `devClient.orgs.create()` |
| List orgs | `GET /apps/:app_id/orgs` | `devClient.orgs.list()` |
| Get org | `GET /apps/:app_id/orgs/:id` | `devClient.orgs.get()` |
| Update org | `PATCH /apps/:app_id/orgs/:id` | `devClient.orgs.update()` |
| Delete org | `DELETE /apps/:app_id/orgs/:id` | `devClient.orgs.delete()` |
---
### Developer Portal
URL: https://staging.docs.archastro.ai/docs/portal
Summary: Your control plane for apps, agents, keys, OAuth, webhooks, workflows, and runtime inspection.
## Overview
The developer portal at [developers.archastro.ai](https://developers.archastro.ai) is the web-based control plane for your ArchAstro apps. Every resource your agents need — API keys, OAuth providers, webhooks, workflows, configs — is managed here.
Portal changes are app-scoped and auditable. Use the portal for configuration and inspection, then automate with the API or CLI for CI/CD workflows.
For the Agent Network web interface (agent management, networks, cross-org connections), see [Agent Network App](/docs/agent-network-app).
---
## App management
When you sign in, you'll see a list of your apps. Each app is an isolated container that scopes all resources: agents, keys, users, threads, configs, and more.
### API keys
The portal generates two types of keys:
- **Publishable keys** (`pk_live_`) — safe to include in client-side code. Used for SDK initialization and non-sensitive operations.
- **Secret keys** (`sk_live_`) — server-only. Used for agent creation, routine management, and all control-plane operations. Shown once at creation — copy immediately.
You can revoke any key instantly from the portal. Revoked keys stop working immediately.
### Sandboxes
Sandboxes are isolated environments within an app. Each sandbox gets its own set of API keys and its own data partition. Use sandboxes for:
- Testing new routines before production deployment
- Staging environments for CI/CD
- Isolated development environments per team member
Create a sandbox from the portal, and it generates a publishable key automatically. All API calls scoped to a sandbox only see sandbox data.
### Domains
Configure allowed domains for client-side SDK usage and email sending. Add your production domain and any staging domains that need API access.
### Environment variables
Store encrypted configuration values (API keys for external services, webhook secrets, feature flags) that your workflows and scripts can reference. Values are never displayed in the portal after creation — you can only update or delete them.
### Members
Invite teammates to your app with role-based access:
- **Admin** — full access, can manage members and keys
- **Developer** — read/write access to all resources
Pending invitations are visible in the Members section until accepted.
---
## Agents
The Agents section is where you create and manage agent identities. Each agent is a resource with:
- **Name and lookup key** — display name and optional unique identifier for programmatic access
- **Identity** — a description or system prompt that defines the agent's behavior
- **Contact info** — optional email and phone for agent-facing scenarios
- **Profile picture** — upload an avatar for the agent
- **Ownership** — agents can be owned by a team, user, or the system
### Routines
Routines are event-driven behaviors attached to agents. From the portal you can:
- **Create routines** — define the event type (`thread.message_added`, `schedule.cron`, etc.), handler type (workflow, script, or preset), and configuration
- **Activate and pause** — toggle routine execution without deleting
- **Filter by agent** — view routines for a specific agent
- **View run history** — inspect past executions with status, duration, input payload, and output
Routine handler types:
| Handler | How it works |
|---------|-------------|
| **Workflow** | Executes a WorkflowGraph config. Requires a `config_id`. |
| **Script** | Runs inline script code or references a Script config. |
| **Preset** | Delegates to a built-in handler (`participate`, `send_message`, `do_task`). |
### Extensions (tools and skills)
Tools are capabilities you attach to agents. The portal supports:
- **Built-in tools** — platform-provided capabilities like email access, calendar operations, task creation
- **Custom tools** — define your own tools with a name, description, JSON Schema parameters, and a handler (script or workflow)
Tools start in `draft` status and must be activated before agents can use them.
### Context
Context controls what data an agent can access. The portal manages five resource types:
**Installations** — connections between agents and data sources.
| Category | Examples | Requires OAuth |
|----------|----------|---------------|
| Integration | Gmail, Outlook, GitHub, Slack, X | Usually yes |
| Web content | Sites and curated link collections | No |
| Platform content | Threads, uploaded files, and other app data | No |
When you create an integration installation, the portal prompts the user to complete an OAuth flow. Once authorized, the platform automatically creates sources to ingest data.
**Sources** — individual data retrieval tasks within an installation (e.g., "Gmail inbox emails", "GitHub activity feed"). Sources track sync state: `initializing`, `syncing`, `synced`, `error`, `paused`.
**Integrations** — OAuth credential records for connected services. Shows provider, workspace, auth type, and connection date.
**Credentials** — stored API keys and tokens scoped to specific domains, used for external service access.
**Items** — browsable index of ingested context items (documents, messages, code) with content type and source traceability.
---
## Orchestration
### Configs
Configs are versioned artifacts that store workflows, scripts, templates, and other structured content. The portal provides a full-screen editor with:
- **Language-aware editing** — syntax highlighting for YAML, JSON, and Liquid templates
- **Validation** — check syntax and schema before saving
- **Version history** — every save creates a new version; you can view past versions
- **References** — insert references to other configs (cross-linking)
- **Archive/unarchive** — soft-delete without permanent removal
- **Kind filtering** — filter by config type and path prefix
Config kinds include `WorkflowGraph`, `Script`, `AIWorker`, and custom types you define.
### Workflows
The workflow editor is a full-screen visual builder for composing multi-step execution flows. From the portal you can:
- **Build workflow graphs** — add nodes (data, script, template), connect them, and configure each step
- **Run workflows** — execute directly from the editor with a "Run as User" selector to choose execution context
- **Debug** — inspect workflow inputs, outputs, and execution state
- **Version** — every save increments the version number automatically
Workflows are stored as configs with kind `WorkflowGraph` and are referenced by routines and automations via `config_id`.
### Scripts
The script editor provides a full-screen code environment for writing automation logic. Scripts can:
- Run standalone via the "Run" button (with user context selection)
- Be referenced by routines as handlers
- Be embedded in workflow nodes
Scripts are stored as configs with kind `Script`.
### Automations
Automations are app-scoped event handlers (vs. routines which are agent-scoped). The portal shows:
- **Stats dashboard** — scheduled count, event trigger count, running count
- **Type filter** — view scheduled automations, event triggers, or all
- **Activation controls** — activate, pause, view runs
- **Run history** — inspect execution records with status and output
Automation types:
| Type | Trigger | Example |
|------|---------|---------|
| **Scheduled** | Cron expression | Daily digest at 8am |
| **Event trigger** | Domain event | Send welcome email on `user.created` |
---
## Users, teams, and organizations
### Users
View and manage all users in your app. The portal supports:
- **Creating users** — with email, name, phone, and confirmation status
- **System users** — bot accounts that don't need login credentials (auto-generated email)
- **Filtering** — search by name/email, filter by confirmation status
- **Token management** — view and revoke user tokens
### Teams
Teams are workspace containers for threads, tasks, and shared resources. Create teams with a name and description, view members, and manage team threads.
### Organizations
Organizations provide B2B multi-tenancy. Each org has:
- Name, slug (unique identifier), and domain
- Member management
- Hierarchical grouping for apps
---
## Integrations setup
### OAuth providers
Configure sign-in providers (Google, GitHub) with your OAuth client credentials. Each provider needs:
- Client ID and Client Secret from the provider's developer console
- Callback URLs for your application
- Scopes are auto-configured per provider
### OAuth clients
Register third-party applications that can authenticate against your app using OAuth. When enabled, you can:
- Register clients with name, scopes, and redirect URIs
- View client credentials (shown once at creation)
- Enable/disable individual clients
### Webhooks
Set up inbound webhooks for GitHub and Slack with provider-specific signature validation. Each webhook gets an auto-generated delivery URL. Configure which events to receive and set authorization tokens.
---
## Storage
### Files
Browse and manage uploaded files with metadata (filename, content type, size, uploader). Files can be owned by teams or users and are accessible via signed download URLs.
### Objects
View metadata objects stored in the platform. Objects are team-scoped structured data containers.
---
## Threads
Browse conversation threads across your app. The portal provides:
- Thread list with pagination
- Thread detail view with full message history
- Thread metadata (title, slug, channel status, owner)
---
## Portal vs API vs CLI
| Task | Portal | API | CLI |
|------|--------|-----|-----|
| Initial app setup | Best | OK | OK |
| Key management | Good | Good | Good |
| Agent + routine creation | Good | Best | Good |
| Viewing run history | Best | OK | — |
| Workflow editing | Best | — | — |
| Script editing | Best | — | — |
| Config management | Good | Good | Best (local sync) |
| CI/CD automation | — | Best | Good |
| Bulk operations | — | Best | Good |
Use the portal for visual management, workflow building, and inspection. Use the API for programmatic operations. Use the CLI for local development, config sync, and scripting.
---
### Sandboxes
URL: https://staging.docs.archastro.ai/docs/sandboxes
Summary: Isolate test data from production — every resource is partitioned by sandbox so you can develop, test, and demo without affecting real users.
## Overview
Sandboxes provide isolated data environments within your app. Every resource in the platform — users, teams, threads, agents, configs, integrations, and more — is partitioned by sandbox. Requests authenticated with a sandbox key only see and create data in that sandbox, completely isolated from production and from other sandboxes.
Production is `sandbox_id = null`. A sandbox is `sandbox_id = `. The platform enforces this at the query level automatically — you never need to filter by sandbox manually.
Every new app starts with a default sandbox named "Test" and an initial publishable key, ready to use immediately.
---
## Creating sandboxes
Create additional sandboxes through the SDK, CLI, or developer portal:
```ts
const sandbox = await client.sandboxes.create(appId, {
name: "Staging",
slug: "staging",
});
console.log("Sandbox:", sandbox.id); // dsb_abc123
console.log("Slug:", sandbox.slug); // "staging"
```
Slugs must be lowercase alphanumeric with hyphens, 2-100 characters, and unique per app. They cannot start or end with a hyphen.
```bash
# CLI
archastro create sandbox -n "Staging" -s staging
```
---
## Sandbox API keys
Each sandbox has its own API keys, separate from your production app keys. Two key types are available:
| Type | Prefix | Use case |
|------|--------|----------|
| Publishable | `pk_dsb_...` | Client-side code, safe to expose |
| Secret | `sk_dsb_...` | Server-side only, full access |
### Creating keys
```ts
// Create a publishable key (retrievable anytime)
const { full_key } = await client.sandboxes.createKey(appId, sandbox.id, "publishable");
console.log(full_key); // pk_dsb_7xK9mQ2v_a8Yb3Zc5Wd2Qf9Gh
// Create a secret key (shown only once, then hashed)
const { full_key: secretKey } = await client.sandboxes.createKey(appId, sandbox.id, "secret");
console.log(secretKey); // sk_dsb_7xK9mQ2v_j4Km8Np2Rt6Vx0Yw — save this immediately
```
```bash
# CLI
archastro create sandboxkey --sandbox dsb_abc123 -t publishable
archastro create sandboxkey --sandbox dsb_abc123 -t secret
```
Secret keys are hashed with bcrypt on creation. The full key is returned exactly once — if you lose it, revoke and create a new one.
### Revoking keys
```ts
await client.sandboxes.revokeKey(appId, sandbox.id, keyId);
```
```bash
archastro revoke sandboxkey dsk_abc123 --sandbox dsb_abc123
```
### Key properties
| Field | Type | Description |
|-------|------|-------------|
| `id` | string | Key ID (`dsk_` prefix) |
| `type` | enum | `publishable` or `secret` |
| `key_value` | string | Full key (publishable only) |
| `key_hint` | string | Last 4 characters (always available) |
| `status` | enum | `active` or `revoked` |
| `last_used_at` | datetime | Updated on each authenticated request |
| `expires_at` | datetime | Optional expiry |
---
## How sandbox scoping works
When a request arrives with a sandbox API key (or a sandbox-scoped JWT), the platform:
1. Identifies the sandbox from the key prefix
2. Resolves the sandbox context from that key
3. Scopes read operations to that sandbox automatically
4. Tags new records to the same sandbox automatically
This means your code doesn't change at all between production and sandbox — just use a different API key.
```text
Production key (pk_dap_...) → production workspace
Sandbox key (pk_dsb_...) → selected sandbox workspace
```
Sandbox scoping applies across all major runtime and control-plane resources, including users, teams, threads, messages, agents, configs, integrations, automations, files, and secrets.
---
## Sandbox emails
Emails sent within a sandbox are captured instead of delivered. This lets you test email flows (registration, notifications, magic links) without sending real emails.
### Viewing captured emails
```ts
// List all captured emails
const emails = await client.sandboxEmails.list(appId, sandbox.id);
// Get a specific email
const email = await client.sandboxEmails.get(appId, sandbox.id, emailId);
console.log(email.subject);
console.log(email.html_body);
```
```bash
# CLI
archastro list sandboxmails --sandbox dsb_abc123
archastro describe sandboxmail sem_abc123 --sandbox dsb_abc123
```
### Email properties
| Field | Type | Description |
|-------|------|-------------|
| `id` | string | Email ID (`sem_` prefix) |
| `from_name` | string | Sender name |
| `from_address` | string | Sender email address |
| `to` | array | Recipients `[{name, address}]` |
| `cc`, `bcc` | array | CC/BCC recipients |
| `subject` | string | Email subject line |
| `text_body` | string | Plain text content |
| `html_body` | string | HTML content |
| `headers` | object | Email headers |
### Cleaning up
```ts
// Delete one email
await client.sandboxEmails.delete(appId, sandbox.id, emailId);
// Delete all emails in a sandbox
const { deleted_count } = await client.sandboxEmails.deleteAll(appId, sandbox.id);
```
```bash
archastro delete sandboxmail sem_abc123 --sandbox dsb_abc123
archastro delete sandboxmails --sandbox dsb_abc123 --all
```
---
## Using sandboxes with the CLI
The CLI can be scoped to a sandbox so all commands operate on sandbox data:
```bash
# Activate a sandbox (opens browser to re-authenticate with sandbox scope)
archastro activate sandbox
# List sandboxes — active sandbox is marked with *
archastro list sandboxes
```
When a sandbox is active, the CLI token includes the `sandbox_id` claim. All subsequent commands (creating users, agents, threads, etc.) will operate within that sandbox.
---
## Developer portal
The portal at `developers.archastro.ai` provides a visual interface for sandbox management under **App → Sandboxes**:
- Create and manage sandboxes
- Generate publishable and secret keys (secret keys shown once in a dismissable banner)
- View key status, hints, and last-used timestamps
- Revoke keys with confirmation
---
## API reference
### Sandbox management
| Operation | Endpoint | Description |
|-----------|----------|-------------|
| List | `GET /apps/:app_id/sandboxes` | List all sandboxes with keys |
| Create | `POST /apps/:app_id/sandboxes` | Create a sandbox (auto-generates publishable key) |
| Show | `GET /apps/:app_id/sandboxes/:id` | Get sandbox details with keys |
| Create key | `POST /apps/:app_id/sandboxes/:id/keys` | Create a publishable or secret key |
| Revoke key | `POST /apps/:app_id/sandboxes/:id/keys/:key_id/revoke` | Revoke a key |
### Sandbox emails
| Operation | Endpoint | Description |
|-----------|----------|-------------|
| List | `GET /apps/:app_id/sandboxes/:id/emails` | List captured emails (newest first) |
| Show | `GET /apps/:app_id/sandboxes/:id/emails/:email_id` | Get email details |
| Delete | `DELETE /apps/:app_id/sandboxes/:id/emails/:email_id` | Delete one email |
| Delete all | `DELETE /apps/:app_id/sandboxes/:id/emails` | Delete all emails |
---
## Design patterns
### Integration testing
Use a sandbox to run automated tests against the full platform API without affecting production:
1. Create a sandbox (or use the default "Test" sandbox)
2. Use the sandbox publishable key in your test suite
3. Create users, agents, and threads — all isolated to the sandbox
4. Verify email flows by checking captured sandbox emails
5. Clean up by deleting sandbox emails between test runs
### Demo environments
Create a named sandbox (e.g., `demo`) with pre-seeded data for customer demos. Each demo sandbox is isolated, so you can reset it independently without touching production or other sandboxes.
### Staging pipeline
Use sandboxes as lightweight staging environments:
1. `test` sandbox — automated test suite
2. `staging` sandbox — manual QA and review
3. Production — `null` sandbox (default app keys)
All three share the same app configuration (configs, workflows, agent definitions) but have completely separate user data, threads, and state.
---
### Agents
URL: https://staging.docs.archastro.ai/docs/agents
Summary: Understand the core primitives behind ArchAstro agents — identity, routines, installations, tools, and context.
## Overview
In many agent frameworks, an "agent" exists only while a prompt or workflow is running. In ArchAstro, agents are **persistent platform resources** with identity, lifecycle, scoped data access, and execution history.
This means your agents survive across sessions, operate within clear access boundaries, and can be managed through the portal, API, or CLI like other application resources.
---
## Agent identity
Every agent has a unique identity scoped to your app.
```ts
const agent = await client.rest.createAgent({
name: "Support Agent",
lookup_key: "support-bot",
email: "support@yourapp.com",
identity: "You are a customer support specialist for Acme Corp.",
metadata: {
department: "customer-success",
tier: "enterprise",
},
});
```
**Key properties:**
| Field | Purpose |
|-------|---------|
| `name` | Display name shown in conversations |
| `lookup_key` | App-unique identifier for programmatic access |
| `identity` | Behavioral description for the agent |
| `email`, `phone_number` | Contact fields for agent-facing scenarios |
| `metadata` | Arbitrary extensible data |
| `secret_group_id` | Encrypted credential store for this agent |
When you create an agent, the platform automatically provisions an encrypted credential store scoped to that agent. This is where installation tokens and agent-specific secrets live.
**Agent operations:**
```ts
const agents = await client.rest.listAgents();
const agent = await client.rest.getAgent("agi_abc123");
await client.rest.updateAgent("agi_abc123", {
name: "Senior Support Agent",
identity: "You are a senior support specialist...",
});
await client.rest.deleteAgent("agi_abc123");
```
---
## Routines
Routines are the core execution primitive. Each routine binds an agent to an event type and a handler so the agent can respond automatically when matching events occur.
### Creating a routine
```ts
const routine = await client.rest.createAgentRoutine({
agent_id: agent.id,
name: "billing_triage",
event_type: "thread.message_added",
handler_type: "script",
script: `
const msg = event.payload.message;
if (msg.text.includes("invoice")) {
return { route: "billing", priority: "high" };
}
return { route: "general" };
`,
});
```
### Event types
| Event | Fires when |
|-------|------------|
| `thread.message_added` | A new message is posted in a thread |
| `thread.created` | A new thread is created |
| `thread.member_joined` | A member joins a thread |
| `schedule.cron` | On a cron schedule |
| `connector.connected` | A user completes an OAuth connection |
| `context.ingestion_succeeded` | Data ingestion completes |
### Event filtering
Routines can filter which events actually trigger execution using `event_config`:
```ts
await client.rest.createAgentRoutine({
agent_id: agent.id,
name: "filtered_handler",
event_type: "thread.message_added",
event_config: {
"thread.message_added": {
subject_is_agent: true,
thread_id: ["thr_123"],
},
},
handler_type: "workflow_graph",
config_id: "cfg_workflow_abc",
});
```
### Handler types
**Workflow graph** — executes a saved workflow.
```ts
{
handler_type: "workflow_graph",
config_id: "cfg_abc123"
}
```
**Script** — runs inline code or references a saved Script config.
```ts
{
handler_type: "script",
script: "return { handled: true, result: event.payload.message.text };"
}
{
handler_type: "script",
config_id: "cfg_script_xyz"
}
```
**Preset** — delegates to a built-in handler.
```ts
{
handler_type: "preset",
preset_name: "participate"
}
```
### Routine lifecycle
Routines follow a clear lifecycle: `draft` → `active` → `paused`.
- **Draft** — created but not processing events
- **Active** — listening for matching events and executing
- **Paused** — temporarily stopped and later reactivated
### Run history
Each routine execution records status, timing, input context, and result details. Use the portal or API to monitor run history, troubleshoot failures, and understand how your automations are behaving in practice.
---
## Installations
Installations connect agents to external data sources and capabilities.
### Installation categories
| Category | Examples |
|----------|----------|
| Email and messaging | Gmail, Outlook, Slack |
| Repositories and developer systems | GitHub |
| Web content | Sites and link collections |
| Platform content | Threads, uploaded files, and other app data |
### Installation lifecycle
For OAuth-backed installations, a user completes the provider's authorization flow, the connection is stored securely, and the installation can then be activated for the agent.
### Working with installations
```ts
const kinds = await client.rest.listInstallationKinds();
const install = await client.rest.createAgentInstallation({
agent_id: agent.id,
kind: "integration/gmail",
});
await client.rest.activateAgentInstallation(install.id);
await client.rest.pauseAgentInstallation(install.id);
```
---
## Tools
Tools are capabilities that agents can invoke during conversations or routine execution.
### Built-in tools
The platform provides built-in tools for common operations such as messaging, tasks, calendars, and connected-service actions.
### Custom tools
You can also define app-specific tools that call your own APIs or internal business logic through the same agent workflow surface.
---
## Context and retrieval
Context sources control what data an agent can access. ArchAstro combines multiple approved knowledge sources so agents can retrieve relevant context when they need it.
Typical context can include:
- connected inboxes and repositories
- uploaded files and documents
- website content
- thread history
- long-term memory
Design your context footprint carefully. An agent should only have access to the data it actually needs.
---
## How the pieces fit together
```mermaid
flowchart TD
A["Agent"]
A --> B["Identity and instructions"]
A --> C["Routines"]
A --> D["Installations and context"]
A --> E["Tools"]
C --> F["Events trigger execution"]
D --> G["Approved knowledge is retrieved when needed"]
E --> H["Actions run through platform or app logic"]
```
---
## Best practices
1. Keep each agent's scope narrow and intentional.
2. Attach only the routines and knowledge sources the agent actually needs.
3. Test new routines in sandbox environments before production rollout.
4. Monitor routine history for failures, unexpected triggers, and noisy behavior.
5. Gate side-effectful actions behind explicit approval or workflow steps.
---
### Agent Memory
URL: https://staging.docs.archastro.ai/docs/agent-memory
Summary: Give agents memory that carries useful information across a conversation or across multiple conversations.
## Overview
ArchAstro provides two memory patterns for agents:
- **Thread-scoped memory** — key-value storage tied to a specific conversation.
- **Long-term memory** — durable memory that helps an agent recall useful information across conversations.
Both are built into the platform and available through the API and SDK.
---
## Thread-scoped memory
Thread-scoped memory stores key-value pairs within a single thread. Agents can read and write memory using built-in tools during conversations.
### Tools
**`get_memory`** — retrieve a value by key:
| Parameter | Type | Required | Description |
|-----------|------|----------|-------------|
| `key` | string | Yes | The memory key to retrieve |
Returns the stored value, or `null` if the key doesn't exist.
**`set_memory`** — store or delete a value:
| Parameter | Type | Required | Description |
|-----------|------|----------|-------------|
| `key` | string | Yes | The memory key to store |
| `value` | string | No | The value to store. Omit or pass empty string to delete the key |
Values can be any string, including JSON.
### Constraints
- Thread-scoped memory is **not supported for transient threads**.
- Memory is scoped to a specific agent and thread combination. Two agents in the same thread have separate thread memory.
### Use cases
- Tracking conversation state
- Storing user preferences within an active conversation
- Accumulating structured data across multiple turns
---
## Long-term memory
Long-term memory stores information across conversations and helps agents recall preferences, facts, instructions, and notes over time.
### Collections
Memory is organized into four system collections:
| Collection | Purpose |
|------------|---------|
| `preferences` | User preferences, communication style, settings |
| `facts` | Factual information about the user or environment |
| `instructions` | Standing instructions and guidelines |
| `notes` | General observations |
You can also create custom collections using the `custom:{name}` format, such as `custom:projects`.
### Storing memories
```ts
await client.rest.storeAgentMemory(agent.id, {
content: "Account tier: enterprise, region: EU-West",
category: "facts",
label: "account_info",
});
await client.rest.storeAgentMemory(agent.id, {
content: "Project Alpha deadline is March 15",
category: "custom:projects",
});
```
### Recalling memories
```ts
const memories = await client.rest.recallAgentMemory(agent.id, {
query: "What tier is this account?",
max_results: 5,
recency_days: 30,
});
for (const memory of memories) {
console.log(`[${memory.collection}] ${memory.content}`);
}
```
The platform ranks relevant memory items and returns the most useful matches for the query.
### Listing and managing memories
```ts
const collections = await client.rest.listAgentMemoryCollections(agent.id);
const items = await client.rest.listAgentMemory(agent.id, {
category: "preferences",
limit: 20,
offset: 0,
});
await client.rest.deleteAgentMemory(agent.id, itemId);
```
---
## Automatic memory capture
When enabled, ArchAstro can automatically save useful facts, preferences, instructions, and notes from completed conversations into long-term memory.
This is useful when you want agents to build continuity over time without requiring users to repeat the same information in every new conversation.
### What it captures
Typical examples include:
- communication preferences
- project details and deadlines
- standing instructions
- durable facts the agent should remember later
### How to think about it
Treat automatic memory capture as an optional product behavior that improves continuity. If your use case requires tighter retention or more explicit review, you can rely on direct memory APIs instead of automatic capture.
---
## How memory connects to agent context
Long-term memory becomes part of the agent's broader available context alongside approved documents, messages, and other connected knowledge sources.
```
Agent query
│
▼
Relevant context lookup
│
├── Connected knowledge sources
├── Long-term memories
└── Thread-scoped memory
│
▼
Ranked results returned to agent
```
---
## Design patterns
### Remember-then-act
1. A user shares a durable preference such as response style.
2. The preference is saved to memory.
3. In a later conversation, the agent recalls it before responding.
### Shared knowledge base
Multiple agents can read from the same approved memory collections when they share access to the same context.
### Progressive profiling
Use memory to build a richer understanding over time:
- first interaction: role and basic preferences
- later interaction: tools, workflows, and team structure
- future interaction: use that context without requiring repetition
---
### Workflows
URL: https://staging.docs.archastro.ai/docs/workflows
Summary: Compose multi-step execution flows with visual editing, reusable logic, and app-scoped execution.
## Overview
Workflows let you compose multi-step execution flows that orchestrate agent behavior, data transformations, and connected-service actions. They go beyond single-event routines and are useful for handoffs, conditional branching, retries, and longer-running business processes.
Workflows are stored as versioned configs and can be referenced by agent routines and automations.
---
## Building workflows
### Portal editor
The developer portal provides a visual workflow builder:
1. Navigate to **Workflows** under your app.
2. Click **New Workflow** and enter a name.
3. Add nodes to the canvas.
4. Connect nodes to define execution order.
5. Click **Save** to create a new version.
The editor includes:
- **Run as User** selector for scoped execution context
- **Debug mode** for inspecting workflow inputs and outputs
- **Auto-versioning** for safe iteration and rollback
### Workflow execution
Workflows can be triggered three ways:
1. **Agent routines** — attach a workflow to an agent event
2. **Automations** — execute a workflow on a schedule or app event
3. **Direct API call** — run a workflow immediately through the API
```json
{
"config_id": "cfg_workflow_abc",
"input": {
"thread_id": "thr_xyz",
"action": "triage"
}
}
```
When triggered by a routine, the workflow receives the triggering event and its input payload.
---
## Node types
### Script nodes
Use script nodes for custom data transformation, business logic, or service integration steps.
### Template nodes
Render templates for structured output such as emails, messages, or payloads.
### Data nodes
Transform and reshape data between steps.
---
## Scripts and expressions inside workflows
Workflows support both scripts and lightweight expressions:
- **Scripts** for custom logic and multi-step data handling
- **Expressions** for simple conditions and field access
From an external developer perspective, the important point is that workflows let you mix declarative flow design with custom logic where needed, while still operating inside your app's authorization boundaries.
---
## API reference
The full external API surface is published at [`/openapi.json`](/openapi.json).
Typical workflow operations in the reviewed public docs surface include:
- running a workflow
- listing available workflow node types
- retrieving the published workflow script language metadata
Internal-only execution helpers and validation/debug endpoints are intentionally omitted from the public docs artifact.
---
## When to use workflows vs routines
| Scenario | Use |
|----------|-----|
| Single event → single action | Routine |
| Multi-step orchestration | Workflow |
| Conditional branching | Workflow |
| Data transformation pipeline | Workflow |
| Scheduled batch processing | Automation → workflow |
| Human approval gate | Workflow |
Routines decide **when** work should run. Workflows define **what** should happen once execution begins.
---
### Automations
URL: https://staging.docs.archastro.ai/docs/automations
Summary: Run workflows on a schedule or in response to platform events — app-level automation without writing server code.
## Overview
Automations execute a WorkflowGraph automatically, either on a cron schedule or when a platform event occurs. They are app-level constructs — unlike [routines](/docs/agents) which are scoped to a specific agent, automations run at the app level and can orchestrate across agents, users, and teams.
Automations are managed through the developer portal, SDK, or CLI. Each automation links to a WorkflowGraph config that defines the logic to execute.
---
## Automation types
### Trigger automations
Trigger automations fire when a specific platform event occurs. The event payload is passed into the workflow as input.
```ts
const automation = await client.automations.create(appId, {
name: "Welcome New Members",
type: "trigger",
trigger: "thread.member_joined",
config_id: "cfg_welcome_workflow",
});
await client.automations.activate(appId, automation.id);
```
When `thread.member_joined` fires, the linked workflow receives:
```json
{
"trigger": "thread.member_joined",
"payload": { /* event-specific data */ }
}
```
### Scheduled automations
Scheduled automations fire on a cron schedule. The workflow receives the scheduled timestamp as input.
```ts
const automation = await client.automations.create(appId, {
name: "Daily Digest",
type: "scheduled",
schedule: "0 9 * * *", // 9am UTC daily
config_id: "cfg_digest_workflow",
run_as_user_id: "usr_abc123", // optional: execute as this user
});
await client.automations.activate(appId, automation.id);
```
The workflow receives:
```json
{
"trigger": "workflow.scheduled",
"payload": { "scheduled_at": "2026-02-28T09:00:00Z" }
}
```
---
## Available event types
Query the available events through the API or SDK:
```ts
const events = await client.automations.events(appId);
// Returns [{ name: "thread.created", description: "A new thread was created" }, ...]
```
### Thread events
| Event | Description |
|-------|-------------|
| `thread.created` | A new thread was created |
| `thread.deleted` | A thread was deleted |
| `thread.message_added` | A message was added to a thread |
| `thread.member_joined` | A member joined a thread |
| `thread.member_left` | A member left a thread |
| Conversation session started | An active conversation session started |
| Conversation session completed | An active conversation session completed |
| Conversation session ended | A conversation session ended |
### Connector events
| Event | Description |
|-------|-------------|
| `connector.connected` | An OAuth connector was connected |
### Context events
| Event | Description |
|-------|-------------|
| `context.ingestion.started` | A context ingestion job started |
| `context.ingestion.running` | A context ingestion job is running |
| `context.ingestion.succeeded` | A context ingestion job completed |
| `context.ingestion.failed` | A context ingestion job failed |
| `context.source.paused` | A context source was auto-paused after consecutive failures |
| `context.installation.suspended` | A context installation was suspended due to auth errors |
### Credential events
| Event | Description |
|-------|-------------|
| `credential.created` | A new credential was created |
| `credential.updated` | A credential was updated |
### Email events
| Event | Description |
|-------|-------------|
| `email.received` | An inbound email was received |
| `email.processed` | An email was processed |
### Agent session events
| Event | Description |
|-------|-------------|
| `agent_session.started` | An agent session started in a thread |
| `agent_session.stopped` | An agent session stopped |
| `agent_session.event_received` | An agent session received a chat event |
---
## Status lifecycle
Automations have three statuses:
```mermaid
stateDiagram-v2
[*] --> draft
draft --> running : activate
running --> paused : pause
paused --> running : activate
paused --> draft : reset
draft --> [*] : delete
paused --> [*] : delete
running --> [*] : delete
```
| Status | Behavior |
|--------|----------|
| `draft` | Default. Automation exists but does not run. |
| `running` | Active. Trigger automations fire on matching events. Scheduled automations are enqueued for the next cron occurrence. |
| `paused` | Suspended. Trigger events are ignored. Scheduled jobs are cancelled. |
Activating requires a `config_id` pointing to a valid WorkflowGraph config. The workflow must contain a trigger node matching the automation's event.
---
## Automation runs
Each execution creates an `AutomationRun` record that tracks status and results.
### Run statuses
| Status | Meaning |
|--------|---------|
| `pending` | Queued, awaiting execution |
| `running` | Workflow is executing |
| `completed` | Finished successfully |
| `failed` | Execution failed (check `result.error`) |
| `cancelled` | Cancelled (e.g., automation paused or deleted) |
### Viewing runs
```ts
// List runs for an automation
const runs = await client.automations.runs(appId, automation.id, {
status: "failed", // optional filter
limit: 20, // default 50, max 100
});
// Get a specific run
const run = await client.automations.run(appId, runId);
console.log(run.status); // "completed"
console.log(run.result); // { payload: {...}, output: [...] }
```
```bash
archastro list automationruns --automation aut_abc123
archastro list automationruns --automation aut_abc123 --status failed
archastro describe automationrun atr_abc123
```
### Run results
On success, the `result` field contains:
```json
{
"payload": { /* final workflow output value */ },
"output": ["line 1 from println", "line 2 from println"]
}
```
On failure:
```json
{
"error": "Script execution timed out"
}
```
---
## Automation properties
| Field | Type | Description |
|-------|------|-------------|
| `id` | string | Automation ID (`aut_` prefix) |
| `name` | string | Display name (required) |
| `description` | string | Optional description |
| `type` | enum | `trigger` or `scheduled` |
| `status` | enum | `draft`, `running`, or `paused` |
| `trigger` | string | Event name (required for trigger type) |
| `schedule` | string | Cron expression (required for scheduled type) |
| `config_id` | string | WorkflowGraph config to execute |
| `run_as_user_id` | string | Optional user identity for execution context |
| `lookup_key` | string | Optional unique slug per app |
| `metadata` | object | Arbitrary metadata |
---
## Automations vs. routines
Both automations and routines react to events, but they serve different purposes:
| | Automations | Routines |
|---|---|---|
| Scope | App-level | Agent-level |
| ID prefix | `aut_` | `arn_` |
| Handler types | WorkflowGraph only | WorkflowGraph, Script, or Preset |
| Managed by | Developer (portal, SDK, CLI) | Developer per-agent |
| Use case | App-wide orchestration, scheduled jobs | Agent behavior and personality |
| Status values | `draft` / `running` / `paused` | `draft` / `active` / `paused` |
Use automations for cross-cutting concerns (daily reports, event-driven workflows, data pipelines). Use routines for agent-specific behavior (how an agent responds to messages, memory capture, participation patterns).
---
## CLI commands
```bash
# List automations
archastro list automations
archastro list automations --type trigger
# Create
archastro create automation -n "Nightly Report" -t scheduled --schedule "0 0 * * *" --config-id cfg_abc123
# Manage lifecycle
archastro activate automation aut_abc123
archastro pause automation aut_abc123
# Update
archastro update automation aut_abc123 -n "Updated Name" --config-id cfg_def456
# Delete
archastro delete automation aut_abc123
# View runs
archastro list automationruns --automation aut_abc123
archastro describe automationrun atr_abc123
```
---
## API reference
### Automation management
| Operation | Endpoint | Description |
|-----------|----------|-------------|
| List | `GET /apps/:app_id/automations` | List automations (optional `?type=` filter) |
| Create | `POST /apps/:app_id/automations` | Create an automation |
| Show | `GET /apps/:app_id/automations/:id` | Get automation details |
| Update | `PATCH /apps/:app_id/automations/:id` | Update an automation |
| Delete | `DELETE /apps/:app_id/automations/:id` | Delete an automation |
| Activate | `POST /apps/:app_id/automations/:id/activate` | Set status to `running` |
| Pause | `POST /apps/:app_id/automations/:id/pause` | Set status to `paused` |
| Events | `GET /apps/:app_id/automations/events` | List available event types |
### Automation runs
| Operation | Endpoint | Description |
|-----------|----------|-------------|
| List | `GET /apps/:app_id/automations/:id/runs` | List runs (optional `?status=` filter, cursor pagination) |
| Show | `GET /apps/:app_id/automations/runs/:run_id` | Get run details |
---
## Design patterns
### Event-driven onboarding
Trigger a workflow when a new user joins a thread to send a welcome message and configure agent behavior:
```ts
await client.automations.create(appId, {
name: "Onboarding Flow",
type: "trigger",
trigger: "thread.member_joined",
config_id: "cfg_onboarding_workflow",
});
```
### Scheduled reporting
Run a daily workflow that aggregates activity and posts a summary to a team thread:
```ts
await client.automations.create(appId, {
name: "Daily Activity Report",
type: "scheduled",
schedule: "0 9 * * 1-5", // 9am UTC, weekdays
config_id: "cfg_daily_report",
run_as_user_id: "usr_reporter",
});
```
### Context ingestion monitoring
React to context ingestion failures to alert the team or trigger a retry:
```ts
await client.automations.create(appId, {
name: "Ingestion Failure Alert",
type: "trigger",
trigger: "context.ingestion.failed",
config_id: "cfg_ingestion_alert",
});
```
---
### Computer Use
URL: https://staging.docs.archastro.ai/docs/computer-use
Summary: Provision remote machines and execute development or operational tasks through ArchAstro-managed environments.
## Overview
Computer Use lets agents provision and control remote Linux machines. Agents can execute shell commands, read and write files, and complete development or operational tasks through the platform API or built-in AI tools.
Computers remain available across commands, so agents can complete multi-step workflows over time instead of starting from scratch for every action.
---
## Provisioning a computer
Create a computer for an agent through the SDK or API:
```ts
const computer = await client.rest.createAgentComputer(agent.id, {
name: "dev-machine",
lookup_key: "primary",
region: "iad",
metadata: {
purpose: "ci-runner",
},
});
console.log("Computer:", computer.id);
console.log("Status:", computer.status);
```
Provisioning is asynchronous. The computer starts in `pending`, moves through `provisioning`, and becomes `ready` when it can accept commands.
### Computer statuses
| Status | Meaning |
|--------|---------|
| `pending` | Created, not yet provisioned |
| `provisioning` | Environment setup in progress |
| `ready` | Live and accepting commands |
| `error` | Provisioning failed |
| `destroyed` | Marked for deletion |
### Computer properties
| Field | Type | Description |
|-------|------|-------------|
| `id` | string | Computer ID |
| `name` | string | Display name |
| `lookup_key` | string | Unique per agent |
| `status` | enum | Current state |
| `region` | string | Deployment region |
| `config` | object | Custom configuration |
| `metadata` | object | Arbitrary metadata |
| `error_message` | string | Error details if provisioning failed |
| `last_active_at` | datetime | Last command execution time |
---
## Executing commands
Once a computer is ready, execute shell commands:
```ts
const result = await client.rest.execComputerCommand(computer.id, {
command: "git clone https://github.com/org/repo.git && cd repo && npm test",
dir: "/home/sprite",
});
console.log("Output:", result.output);
console.log("Exit code:", result.exit_code);
console.log("Status:", result.status);
```
Commands run with a timeout, and the working directory defaults to the computer's home directory.
### Environment
Computers provide a Linux development environment suitable for common scripting, repository, and build tasks.
Typical capabilities include:
- source checkout and file operations
- package installation and dependency management
- test and build execution
- multi-step scripted workflows over persistent files
Use Computer Use only where it fits your security, approval, and operational model.
---
## AI tools
Agents can use computers during conversations through three built-in tools:
### `computer_exec`
Execute a shell command on the agent's computer.
| Parameter | Type | Required | Description |
|-----------|------|----------|-------------|
| `command` | string | Yes | Shell command to execute |
| `working_directory` | string | No | Working directory |
Returns `stdout`, `exit_code`, and `status`.
### `computer_write_file`
Write content to a file on the computer.
| Parameter | Type | Required | Description |
|-----------|------|----------|-------------|
| `path` | string | Yes | Absolute file path |
| `content` | string | Yes | File content to write |
### `computer_read_file`
Read the contents of a file from the computer.
| Parameter | Type | Required | Description |
|-----------|------|----------|-------------|
| `path` | string | Yes | Absolute file path |
### Tool resolution
When an agent uses computer tools, the platform automatically routes the request to a ready computer associated with that agent.
---
## Managing computers
```ts
const computers = await client.rest.listAgentComputers(agent.id);
const computer = await client.rest.getAgentComputer(computerId);
await client.rest.refreshAgentComputer(computerId);
await client.rest.destroyAgentComputer(computerId);
```
---
## API reference
| Operation | Endpoint | Description |
|-----------|----------|-------------|
| Create | `POST /agents/:id/computers` | Provision a new computer |
| List | `GET /agents/:id/computers` | List computers for an agent |
| Show | `GET /agents/:id/computers/:computer_id` | Get computer details |
| Exec | `POST /agent_computers/:computer_id/exec` | Execute a command |
| Refresh | `POST /agent_computers/:computer_id/refresh` | Refresh status |
| Delete | `DELETE /agents/:id/computers/:computer_id` | Destroy a computer |
---
## Design patterns
### Build and test runner
An agent provisions a computer, checks out a codebase, runs validation commands, and reports the result back to a thread.
### Review assistant
An agent pulls a change, runs checks, and summarizes findings for a human reviewer.
### Operational automation
An agent performs recurring scripted diagnostics or maintenance tasks and reports anomalies to the relevant team.
---
### Scripts
URL: https://staging.docs.archastro.ai/docs/scripts
Summary: Write custom runtime logic for data shaping, policy checks, adapter code, and workflow nodes.
## Overview
Scripts let you run custom logic inside the ArchAstro runtime. Use them when generic workflow nodes are not enough for data transformation, policy enforcement, adapter logic, conditional routing, or custom validation.
Scripts can run as standalone logic, within routines, or as nodes in workflows. They are stored as versioned configs and edited in the portal.
---
## Writing scripts
### In the portal
1. Navigate to **Scripts** under your app.
2. Click **New Script**.
3. Write your code in the editor.
4. Select a **Run as User** context.
5. Click **Run** to test.
6. Click **Save** to create a new version.
Every save creates a new version. You can review earlier versions and revert when needed.
### Via the API
Scripts participate in the public developer surface through workflow execution, workflow metadata, configs, and other app-scoped resources. The reviewed external endpoint list is published at [`/openapi.json`](/openapi.json).
```json
{
"script": "const total = input.items.reduce((sum, i) => sum + i.price, 0); return { total, count: input.items.length };",
"input": {
"items": [
{ "name": "Widget", "price": 29.99 },
{ "name": "Gadget", "price": 49.99 }
]
}
}
```
---
## How scripts are used
| Context | How it works |
|---------|-------------|
| **Routine handler** | Use a script as the code executed when a routine fires |
| **Workflow node** | Add a script node to a workflow |
| **Standalone** | Execute through the API or portal run flow |
| **Custom tool** | Back a tool with app-specific logic |
---
## Scripts vs expressions
| Feature | Script | Expression |
|---------|--------|------------|
| Multi-statement logic | Yes | No |
| Return values | Explicit `return` | Implicit evaluation |
| Side effects | Possible | No |
| Use in workflows | Standalone nodes | Inline conditions |
| Complexity | Flexible | Simple data access and conditions |
Use expressions for simple conditions. Use scripts when you need richer logic, error handling, or multi-step transformations.
---
## Use cases
- **Data transformation** — reshape API responses between workflow steps
- **Policy enforcement** — validate inputs against business rules before actions proceed
- **Adapter logic** — normalize data between systems
- **Conditional routing** — evaluate richer branching conditions
- **Custom validation** — enforce schema or content requirements on outputs
- **Aggregation** — combine data from multiple sources before passing it on
---
### Extensions & Integrations
URL: https://staging.docs.archastro.ai/docs/extensions-integrations
Summary: Connect OAuth providers, configure webhooks, and build agent capabilities with tools and connectors.
## Overview
ArchAstro treats integrations as first-class platform primitives. Agents access external services through **installations** (scoped data connections), users authorize access through **OAuth connectors**, and external systems push events via **webhooks**.
This page covers the integration surface end-to-end: OAuth setup, connector flows, webhook configuration, and the tools that agents use to act on connected data.
---
## OAuth providers
### Supported providers
| Provider | Key | What agents can access |
|----------|-----|----------------------|
| Google | `google` | Gmail, Calendar, Drive |
| Microsoft | `microsoft` | Outlook, Calendar, OneDrive |
| GitHub | `github` | Repos, Issues, PRs, Actions |
| Slack | `slack` | Channels, Messages, Users |
| X (Twitter) | `x_twitter` | Posts, DMs, Timelines |
### Setting up OAuth in the portal
1. Go to **OAuth** → **Providers** under your app
2. Click **Configure** on the provider you want
3. Enter the **Client ID** and **Client Secret** from the provider's developer console
4. The platform auto-configures callback URLs and scopes
5. Save the configuration
Once configured, users in your app can connect their accounts through the connector OAuth flow.
### Connector flow (user-facing)
The connector flow is how end users authorize access to their external accounts. The SDK handles this end-to-end:
```ts
import { buildConnectorAuthorizeUrl } from "@archastro/sdk";
// Generate the OAuth authorization URL
const url = await buildConnectorAuthorizeUrl("google", {
restApi: client.rest,
teamId: teamId,
accessLevel: "full_access",
webRedirect: "https://yourapp.com/auth/callback",
});
// Redirect the user to `url`
// After authorization, they're redirected back to your app
```
Check connection state:
```ts
const state = await client.rest.getConnectorState("google", teamId);
// { connected: true, scopes: ["gmail.readonly", "calendar.events"], ... }
```
Or check per-user:
```ts
const state = await client.rest.getUserConnectorState("google");
```
Disconnect:
```ts
await client.rest.disconnectConnector("google", { teamId });
```
### OAuth API endpoints
**User-scoped connector endpoints:**
```
GET /api/v2/users/:user_id/connectors/:provider/state # Check state
POST /api/v2/users/:user_id/connectors/:provider/handoff # Start OAuth
DELETE /api/v2/users/:user_id/connectors/:provider # Disconnect
```
Team-scoped connectors use the same pattern under `/api/v2/teams/:team_id/connectors/`.
**Handoff request:**
```json
{
"access_level": "readwrite",
"services": ["gmail", "calendar"],
"return_to": "/account"
}
```
Returns `{ authorize_url: "https://accounts.google.com/..." }` — redirect the user there.
**Browser-based OAuth endpoints:**
```
GET /auth/:provider # Start OAuth login
GET /auth/:provider/callback # OAuth callback
GET /auth/federated/:provider/authorize # Federated OAuth
GET /auth/federated/:provider/callback # Federated callback
GET /connect/:provider/authorize # Connector OAuth
GET /connect/:provider/callback # Connector callback
```
**OAuth server endpoints:**
```
GET /oauth/scopes # List available scopes
POST /oauth/token # Exchange tokens
POST /oauth/device/authorize # Device flow start
POST /oauth/device/approve # Approve device
```
---
## GitHub App integration
GitHub App integration provides a deeper connection to GitHub than the standard OAuth connector. Instead of acting on behalf of a single user, a GitHub App is installed at the organization or repository level and receives events and permissions independently.
### How it works
1. The developer registers a GitHub App in the GitHub developer settings
2. The developer configures the GitHub App's webhook URL to point to ArchAstro (see below)
3. A user installs the GitHub App on their GitHub org or repos
4. GitHub sends installation and repository events to ArchAstro
5. ArchAstro links the GitHub installation to your app
6. Connected agents can use GitHub capabilities based on the installation's permissions
### Installation record
GitHub App installations use the following kind and category:
| Field | Value |
|-------|-------|
| `kind` | `integration/github_app` |
| `category` | `integration` |
| `requires_integration` | `true` |
Because `requires_integration` is true, the installation only activates after a matching integration is connected with valid credentials.
### Webhook processing
GitHub App events are delivered to a global endpoint rather than the per-app webhook endpoint used by standard provider webhooks:
```
POST /webhooks/github_app
```
**Verification:** Every incoming request is verified using HMAC-SHA256. The platform computes the signature over the raw request body using the GitHub App's webhook secret and compares it against the `X-Hub-Signature-256` header. Requests that fail verification are rejected with a 401.
After verification, ArchAstro processes events asynchronously by type (`installation`, `push`, `pull_request`, `issues`, etc.). Common event flows:
- **`installation` / `installation_repositories`** — creates or updates Integration records when users install or modify the app
- **`push`** — triggers source ingestion for connected repositories
- **`pull_request`** / **`issues`** — can trigger agent routines or update context items
### GitHub capabilities for agents
When a GitHub App installation is active, ArchAstro makes GitHub capabilities available to the agent automatically based on installation scope and permissions.
If an agent has both a custom tool and an auto-provided GitHub capability with the same function, the custom tool is used.
Example of tools that might be derived from a GitHub App installation:
| Tool key | Description |
|----------|-------------|
| `github_create_issue` | Create an issue in a connected repository |
| `github_list_pull_requests` | List open PRs for a repository |
| `github_get_file_contents` | Read file contents from a branch |
| `github_create_comment` | Comment on an issue or PR |
These capabilities are available without extra setup once the GitHub App installation is active and credentials are valid.
### Comparison with OAuth connector
| | OAuth connector (`github`) | GitHub App (`integration/github_app`) |
|---|---|---|
| **Auth scope** | Per-user | Per-org or per-repo |
| **Token type** | User OAuth token | App installation token |
| **Receives webhooks** | Via standard webhook config | Via global `/webhooks/github_app` endpoint |
| **Best for** | User-scoped actions (PRs, commits as user) | Org-wide automation (CI, bots, repo management) |
Use the OAuth connector when agents need to act as a specific user. Use the GitHub App integration when agents need org-level access or need to receive repository events.
---
## Slack Bot
The ArchAstro Slack Bot brings your agents directly into Slack. Once an org admin installs the bot, team members can talk to agents by mentioning `@archastro` in any channel — no per-channel setup required.
### Installing the bot
An org admin connects the bot from the **Context → Integrations** page in the developer portal by clicking **Connect Slack**. This redirects to Slack's OAuth consent screen. After approval, the bot is installed in the workspace and appears as a new integration in the list.
Once installed, invite `@archastro` to the Slack channels where you want agents to be available.
### Talking to agents
Mention `@archastro` followed by an agent name and your message:
```text
@archastro @DeployBot what's the status of the staging deploy?
```
The bot immediately shows a thinking indicator while the agent processes the request, then replaces it with the real response.
If you don't specify an agent name, the bot checks whether the channel has a default agent configured. If no agent matches, the bot replies with a list of available agents and example syntax.
### What the bot supports
- **Thinking indicator** — immediate feedback while the agent works, replaced in-place with the answer
- **Formatted responses** — AI markdown is converted to Slack's native formatting (bold, italic, links, headings, code blocks)
- **Per-user memory** — each Slack user is mapped to their own identity so agents remember context per person
- **Agent name display** — responses appear under the agent's name (e.g., "DeployBot") rather than a generic bot name
- **Proactive messages** — agents can broadcast scheduled or event-driven messages to configured Slack channels
### Slack Bot vs. Slack OAuth connector
| | OAuth connector (`slack`) | Slack Bot (`slack_bot`) |
|---|---|---|
| **Purpose** | Read a user's Slack history as agent context | Two-way agent conversations in Slack |
| **Installed by** | Individual users | Org admin (once per workspace) |
| **Use case** | Search past messages, channels, DMs | Ask agents questions, receive answers in Slack |
Use the OAuth connector when agents need to search a user's Slack data. Use the Slack Bot when you want agents to be accessible directly in Slack channels.
---
## Webhooks
Webhooks let external systems push events to your app. ArchAstro supports provider-specific webhooks with built-in signature validation and generic webhooks for any system.
### Provider webhooks
Provider webhooks have built-in signature verification:
- **GitHub** — validates `X-Hub-Signature-256`
- **Slack** — validates Slack signing secret
Create a provider webhook:
```bash
curl -X POST "https://api.archastro.ai/protected/api/v2/developer/apps/${ARCHASTRO_APP_ID}/webhooks" \
-H "Authorization: Bearer ${ARCHASTRO_SECRET_KEY}" \
-H "Content-Type: application/json" \
-d '{
"provider": "github",
"signing_secret": "whsec_..."
}'
```
### Generic webhooks
Generic webhooks work with any system that can POST JSON. Instead of a provider, you specify a `lookup_key`:
```bash
curl -X POST "https://api.archastro.ai/protected/api/v2/developer/apps/${ARCHASTRO_APP_ID}/webhooks" \
-H "Authorization: Bearer ${ARCHASTRO_SECRET_KEY}" \
-H "Content-Type: application/json" \
-d '{
"lookup_key": "billing-events",
"signing_secret": "'"${BILLING_WEBHOOK_SECRET}"'"
}'
```
Use generic webhooks for third-party vendors, CRM systems, payment processors, and any service that can POST JSON.
### Inbound delivery
All webhooks (provider and generic) are delivered to:
```
POST /webhooks/:app_id/:provider_or_key
```
ArchAstro validates signatures, stores delivery events, and processes them asynchronously. Failed events are retried.
### Webhook management API
```text
GET /protected/api/v2/developer/apps/:app_id/webhooks
POST /protected/api/v2/developer/apps/:app_id/webhooks
GET /protected/api/v2/developer/apps/:app_id/webhooks/:id
PATCH /protected/api/v2/developer/apps/:app_id/webhooks/:id
DELETE /protected/api/v2/developer/apps/:app_id/webhooks/:id
GET /protected/api/v2/developer/apps/:app_id/webhooks/:id/events
```
### Webhook management via CLI
```bash
archastro list appwebhooks
archastro create appwebhook -p github -s my_signing_secret
archastro describe appwebhook webhook_abc123
archastro update appwebhook webhook_abc123 --enabled false
archastro delete appwebhook webhook_abc123
```
---
## Integration actions
Once a user has connected a provider, agents can execute actions on the connected service:
```ts
// List connected integrations
const integrations = await client.rest.listIntegrations();
// List available actions for a provider
const actions = await client.rest.listProviderActions("google");
// Execute an action
await client.rest.runAction("google", "send_email", {
to: "user@example.com",
subject: "Follow-up",
body: "Here's the information you requested.",
});
```
For the exact currently published external API surface for integrations and connector operations, use [`/openapi.json`](/openapi.json).
---
## OAuth clients (third-party apps)
If you want third-party applications to authenticate against your ArchAstro app using OAuth, enable third-party OAuth in the portal:
1. Go to **OAuth** → **Clients**
2. Toggle **Enable Third-Party OAuth**
3. Click **Register Client**
4. Enter client name, scopes, and redirect URIs
5. Copy the client credentials (shown once)
Registered clients can then use standard OAuth flows to obtain tokens scoped to your app.
---
## How integrations connect to agents
The full integration flow for an agent:
```
1. Developer configures OAuth provider (portal)
2. Developer creates an installation on an agent (kind: integration/gmail)
3. User completes OAuth connector flow (browser)
4. Platform stores encrypted credentials (Integration record)
5. Installation activates → Sources auto-created
6. Sources begin ingesting data (emails, events, repos)
7. Agent's context fills with searchable items
8. Agent can now search and act on the connected data
```
This architecture separates concerns clearly:
- **OAuth providers** — configured once per app by the developer
- **Installations** — connect a specific agent to a specific data source
- **Integrations** — store per-user OAuth credentials
- **Sources** — track individual data retrieval tasks
- **Tools** — let agents take actions on connected services
---
### API Reference
URL: https://staging.docs.archastro.ai/docs/api-reference
Summary: External API reference for authentication, runtime resources, and developer control-plane operations.
**Base URL:** `https://api.archastro.ai`
The ArchAstro API is organized into three externally documented scope families:
- **Public auth** for login, OAuth, and token exchange
- **Runtime** for user and team resources such as threads, messages, tasks, and connected services
- **Developer control-plane** for app configuration, agents, routines, workflows, webhooks, and other developer operations under the reviewed developer surface
For the machine-readable external API surface, use [`/openapi.json`](/openapi.json).
---
## API scopes
### Public auth scope
- `/api/v2/auth/...`
- `/oauth/...`
### Runtime scopes
- `/api/v2/users/...`
- `/api/v2/teams/...`
- `/api/v2/agents/...`
- `/api/v2/connectors/...`
- selected top-level runtime endpoints such as `/api/v2/scrape`, `/api/v2/search`, and `/api/v2/feedback`
### Developer control-plane scope
- `/protected/api/v2/developer/me`
- `/protected/api/v2/developer/invites/:token/accept`
- `/protected/api/v2/developer/apps`
- reviewed app-scoped families under `/protected/api/v2/developer/apps/:app_id/...`
Internal-only observability, analytics, and execution-debug helpers are intentionally excluded from the public docs artifact even when they exist internally.
---
## Authentication
### API keys
| Key Type | Prefix | Use |
|----------|--------|-----|
| Publishable | `pk_live_` | Client initialization |
| Secret | `sk_live_` | Trusted server operations |
Create keys in [developers.archastro.ai](https://developers.archastro.ai).
### Headers
Use one of:
```http
Authorization: Bearer
```
```http
x-api-key:
```
For user actions after login, use JWT access tokens in `Authorization`.
---
## Auth flows
- `POST /api/v2/auth/register`
- `POST /api/v2/auth/login`
- `POST /api/v2/auth/login/link`
- `POST /api/v2/auth/verify/link`
- `POST /api/v2/auth/login/code`
- `POST /api/v2/auth/code/verify`
- `POST /api/v2/auth/refresh`
- `POST /api/v2/auth/oauth`
- `POST /api/v2/auth/token`
- `POST /oauth/device/authorize`
- `POST /oauth/token`
Use device flow for CLI and other non-browser clients.
---
## Developer control-plane surface
These app-scoped endpoints are available from `@archastro/sdk` and the developer portal.
### Agents
```text
GET /protected/api/v2/developer/apps/:app_id/agents
POST /protected/api/v2/developer/apps/:app_id/agents
GET /protected/api/v2/developer/apps/:app_id/agents/:agent_id
PATCH /protected/api/v2/developer/apps/:app_id/agents/:agent_id
DELETE /protected/api/v2/developer/apps/:app_id/agents/:agent_id
```
### Teams and organizations
```text
GET /protected/api/v2/developer/apps/:app_id/teams
POST /protected/api/v2/developer/apps/:app_id/teams
GET /protected/api/v2/developer/apps/:app_id/teams/:team_id
PATCH /protected/api/v2/developer/apps/:app_id/teams/:team_id
GET /protected/api/v2/developer/apps/:app_id/teams/:team_id/members
POST /protected/api/v2/developer/apps/:app_id/teams/:team_id/members
DELETE /protected/api/v2/developer/apps/:app_id/teams/:team_id/members/:user_id
GET /protected/api/v2/developer/apps/:app_id/orgs
POST /protected/api/v2/developer/apps/:app_id/orgs
GET /protected/api/v2/developer/apps/:app_id/orgs/:id
PATCH /protected/api/v2/developer/apps/:app_id/orgs/:id
DELETE /protected/api/v2/developer/apps/:app_id/orgs/:id
```
### Routines, workflows, and automations
```text
GET /protected/api/v2/developer/apps/:app_id/routines
POST /protected/api/v2/developer/apps/:app_id/agents/:agent_id/routines
PATCH /protected/api/v2/developer/apps/:app_id/routines/:routine_id
POST /protected/api/v2/developer/apps/:app_id/routines/:routine_id/activate
POST /protected/api/v2/developer/apps/:app_id/routines/:routine_id/pause
POST /protected/api/v2/developer/apps/:app_id/workflows/run
GET /protected/api/v2/developer/apps/:app_id/workflows/node-types
GET /protected/api/v2/developer/apps/:app_id/workflows/scripts/language
```
### Installations and context
```text
GET /protected/api/v2/developer/apps/:app_id/installations
GET /protected/api/v2/developer/apps/:app_id/installations/kinds
POST /protected/api/v2/developer/apps/:app_id/agents/:agent_id/installations
POST /protected/api/v2/developer/apps/:app_id/installations/:installation_id/activate
GET/POST /protected/api/v2/developer/apps/:app_id/context/sources
GET/POST /protected/api/v2/developer/apps/:app_id/context/integrations
GET/POST /protected/api/v2/developer/apps/:app_id/context/credentials
```
### Other common developer surfaces
Also available under reviewed app-scoped families such as `/protected/api/v2/developer/apps/:app_id/...`:
- `configs`
- `webhooks`
- `oauth_providers`
- `oauth_clients`
- `keys`
- `domains`
- `files`
- `custom_objects`
- `sandboxes`
- `users`
- `members`
- `personas`
---
## Runtime surface
### Users
```text
GET /api/v2/users/me
GET /api/v2/users/:user_id
PATCH /api/v2/users/:user_id/profile
PATCH /api/v2/users/:user_id/email
PATCH /api/v2/users/:user_id/timezone
```
### Agents
```text
GET /api/v2/agents
POST /api/v2/agents
GET /api/v2/agents/:agent_id
PATCH /api/v2/agents/:agent_id
DELETE /api/v2/agents/:agent_id
```
### Threads
```text
GET /api/v2/users/:user_id/threads
POST /api/v2/users/:user_id/threads
GET /api/v2/users/:user_id/threads/:thread_id
PATCH /api/v2/users/:user_id/threads/:thread_id
DELETE /api/v2/users/:user_id/threads/:thread_id
GET /api/v2/teams/:team_id/threads
POST /api/v2/teams/:team_id/threads
GET /api/v2/teams/:team_id/threads/:thread_id
PATCH /api/v2/teams/:team_id/threads/:thread_id
DELETE /api/v2/teams/:team_id/threads/:thread_id
```
### Messages
```text
GET /api/v2/users/:user_id/threads/:thread_id/messages
POST /api/v2/users/:user_id/threads/:thread_id/messages
GET /api/v2/teams/:team_id/threads/:thread_id/messages
POST /api/v2/teams/:team_id/threads/:thread_id/messages
```
### Teams, memberships, and invitations
```text
GET /api/v2/teams
POST /api/v2/teams
GET /api/v2/teams/:team_id
PUT /api/v2/teams/:team_id
GET /api/v2/teams/:team_id/members
POST /api/v2/teams/:team_id/invite
POST /api/v2/teams/join
```
### Tasks, objects, artifacts, and integrations
Representative runtime endpoints include:
```text
GET /api/v2/teams/:team_id/tasks
GET /api/v2/teams/:team_id/objects
POST /api/v2/scrape
POST /api/v2/search
POST /api/v2/feedback
GET /api/v2/users/:user_id/integrations
POST /webhooks/:app_id/:provider_or_key
```
---
## WebSocket channels
Real-time communication uses WebSocket channels.
**Connection URL:** `wss://api.archastro.ai/socket/websocket`
| Topic | Purpose |
|-------|---------|
| `user:` | User presence, notifications, direct events |
| `team:` | Team-wide events and member activity |
| `thread:` | Thread messages, typing indicators, and agent responses |
---
## Pagination
The API uses both cursor-based and offset-based pagination depending on the resource type.
Examples:
```http
GET /api/v2/users/:user_id/threads/:thread_id/messages?limit=50&before_cursor=msg_abc123
```
```http
GET /api/v2/teams/:team_id/tasks?limit=25&offset=0
```
---
## Error format
All errors return a consistent JSON structure:
```json
{
"error": {
"code": "not_found",
"message": "Thread not found",
"details": {}
}
}
```
**Common HTTP status codes:**
| Code | Meaning |
|------|---------|
| `400` | Invalid request |
| `401` | Authentication required |
| `403` | Forbidden |
| `404` | Resource not found |
| `422` | Validation failed |
| `500` | Internal server error |
---
### Samples
URL: https://staging.docs.archastro.ai/docs/samples
Summary: Complete, runnable code examples for common agent patterns — from bootstrap to production.
## Overview
Each example is self-contained with prerequisites listed. Copy them directly into your project.
---
## Agent bootstrap script
Create an agent with a routine in a single executable script.
**Prerequisites:** `npm install @archastro/sdk tsx`, set `ARCHASTRO_SECRET_KEY`
```ts
// src/agents/bootstrap.ts
import { ArchAstroClient } from "@archastro/sdk";
const client = new ArchAstroClient({
baseURL: "https://api.archastro.ai",
secretKey: process.env.ARCHASTRO_SECRET_KEY!,
});
async function main() {
await client.ready;
// Create agent identity
const agent = await client.rest.createAgent({
name: "Support Agent",
lookup_key: "support",
identity: "You are a customer support specialist for Acme Corp.",
});
console.log("Agent:", agent.id);
// Attach event-driven routine
const routine = await client.rest.createAgentRoutine({
agent_id: agent.id,
name: "message_handler",
event_type: "thread.message_added",
handler_type: "script",
script: `
const msg = event.payload.message;
const intent = msg.text.toLowerCase().includes("billing")
? "billing" : "general";
return { intent, agent_id: "${agent.id}" };
`,
});
console.log("Routine:", routine.id);
console.log("\nAgent ready. Activate the routine in the portal or via API.");
await client.dispose();
}
main().catch(console.error);
```
```bash
npx tsx src/agents/bootstrap.ts
```
---
## Next.js server auth
Server-side authentication with session management and federated login.
**Prerequisites:** `npm install @archastro/sdk @archastro/sdk-nextjs`, set `ARCHASTRO_SECRET_KEY` and `SESSION_SECRET`
```ts
// src/lib/auth.ts
import {
createSessionManager,
createAuthActions,
} from "@archastro/sdk-nextjs/server";
export const sessionManager = createSessionManager({
secretKey: process.env.SESSION_SECRET!,
cookieName: "archastro_session",
});
export const authActions = createAuthActions({
sessionManager,
apiKey: process.env.ARCHASTRO_SECRET_KEY!,
});
```
```ts
// src/lib/federated-auth.ts
import { createFederatedAuth } from "@archastro/sdk-nextjs/server";
import { sessionManager } from "./auth";
export const federatedAuth = createFederatedAuth({
providers: ["google", "github"],
sessionManager,
apiKey: process.env.ARCHASTRO_SECRET_KEY!,
});
```
```ts
// src/app/api/auth/[...route]/route.ts
import { authActions } from "@/lib/auth";
export const POST = authActions.handler;
export const GET = authActions.handler;
```
---
## Real-time chat with agents
Join a thread and interact with agents in real time.
**Prerequisites:** `npm install @archastro/sdk`, set `ARCHASTRO_SECRET_KEY`
```ts
// src/chat/realtime-demo.ts
import { ArchAstroClient, ChatRoomService } from "@archastro/sdk";
const client = new ArchAstroClient({
baseURL: "https://api.archastro.ai",
secretKey: process.env.ARCHASTRO_SECRET_KEY!,
});
async function main() {
await client.ready;
// Create a team and thread
const teams = await client.rest.listTeams();
const teamId = teams[0].id;
const thread = await client.rest.createThread(teamId, "Agent demo");
console.log("Thread:", thread.id);
// Connect via WebSocket
const chat = new ChatRoomService(client.socket);
const room = await chat.joinThread(teamId, thread.id);
// Listen for all message events
room.on("message_added", (e) => {
const sender = e.message.actor?.name || "Unknown";
console.log(`[${sender}] ${e.message.content}`);
});
room.on("message_updated", (e) => {
console.log(`[Edited] ${e.message.content}`);
});
// Send a message
await room.postMessage("Hello, I need help with my account");
// Keep alive for demo
console.log("Listening for messages... (Ctrl+C to exit)");
}
main().catch(console.error);
```
---
## Agent conversation (direct)
Start a direct agent conversation using the `AgentConversationService`.
**Prerequisites:** `npm install @archastro/sdk`, set `ARCHASTRO_SECRET_KEY`
```ts
// src/chat/agent-conversation.ts
import { ArchAstroClient } from "@archastro/sdk";
const client = new ArchAstroClient({
baseURL: "https://api.archastro.ai",
secretKey: process.env.ARCHASTRO_SECRET_KEY!,
});
async function main() {
await client.ready;
const teams = await client.rest.listTeams();
const session = await client.socket.agentConversationService
.joinConversation({
scope: "team",
teamId: teams[0].id,
});
console.log("Session:", session.getSessionId());
// Listen for agent responses
session.onEvent((event) => {
switch (event.type) {
case "message_added":
console.log(`Agent: ${event.message.content}`);
break;
case "session_ended":
console.log(`Session ended: ${event.reason}`);
break;
}
});
// Send a message
await session.sendMessage({ content: "What can you help me with?" });
console.log("Message sent, waiting for response...");
}
main().catch(console.error);
```
---
## Multi-agent network
Create two agents that collaborate in a shared thread using participate routines.
**Prerequisites:** `npm install @archastro/sdk tsx`, set `ARCHASTRO_SECRET_KEY`
```ts
// src/agents/multi-agent-network.ts
import { ArchAstroClient, ChatRoomService } from "@archastro/sdk";
const client = new ArchAstroClient({
baseURL: "https://api.archastro.ai",
secretKey: process.env.ARCHASTRO_SECRET_KEY!,
});
async function main() {
await client.ready;
// Create two agents with complementary roles
const researcher = await client.rest.createAgent({
name: "Research Agent",
lookup_key: "researcher",
identity:
"You are a research specialist. Find relevant information " +
"and provide thorough analysis with cited sources.",
});
const writer = await client.rest.createAgent({
name: "Writer Agent",
lookup_key: "writer",
identity:
"You are a writing specialist. Take research findings " +
"and synthesize them into clear, actionable summaries.",
});
// Create a team and add both agents
const team = await client.rest.createTeam({ name: "Research & Writing" });
await client.rest.addTeamMember(team.id, {
agent_id: researcher.id,
role: "member",
});
await client.rest.addTeamMember(team.id, {
agent_id: writer.id,
role: "member",
});
// Create a shared thread
const thread = await client.rest.createThread(team.id, "Analysis");
// Attach participate routines
for (const agent of [researcher, writer]) {
await client.rest.createAgentRoutine({
agent_id: agent.id,
name: `${agent.name}_participate`,
event_type: "thread.message_added",
handler_type: "preset",
preset_name: "participate",
});
}
// Observe in real time
const chat = new ChatRoomService(client.socket);
const room = await chat.joinThread(team.id, thread.id);
room.on("message_added", (e) => {
console.log(`[${e.message.actor?.name}] ${e.message.content}`);
});
await room.postMessage("Research AI agent frameworks and summarize the top 3.");
console.log("Conversation started. Thread:", thread.id);
}
main().catch(console.error);
```
```bash
npx tsx src/agents/multi-agent-network.ts
```
For more patterns and cross-org examples, see [Agent Network](/docs/agent-network) and [Networks](/docs/networks).
---
## Generic webhook receiver
Set up a webhook to receive events from an external billing system.
**Prerequisites:** Set `ARCHASTRO_SECRET_KEY` and `ARCHASTRO_APP_ID`
```bash
# Create the webhook with a lookup key
curl -X POST "https://api.archastro.ai/protected/api/v2/developer/apps/${ARCHASTRO_APP_ID}/webhooks" \
-H "Authorization: Bearer ${ARCHASTRO_SECRET_KEY}" \
-H "Content-Type: application/json" \
-d '{
"lookup_key": "billing-events",
"signing_secret": "whsec_your_secret_here"
}'
```
External systems send events to:
```
POST https://api.archastro.ai/webhooks//billing-events
```
List recent events:
```bash
# Via CLI
archastro describe appwebhook
# Or via API
curl "https://api.archastro.ai/protected/api/v2/developer/apps/${ARCHASTRO_APP_ID}/webhooks//events" \
-H "Authorization: Bearer ${ARCHASTRO_SECRET_KEY}"
```
---
## OAuth connector flow
Let users connect their Google account to your app.
**Prerequisites:** Configure Google OAuth provider in the portal first
```ts
// src/connectors/google.ts
import { ArchAstroClient, buildConnectorAuthorizeUrl } from "@archastro/sdk";
const client = new ArchAstroClient({
baseURL: "https://api.archastro.ai",
secretKey: process.env.ARCHASTRO_SECRET_KEY!,
});
async function connectGoogle(teamId: string) {
// Generate OAuth URL
const url = await buildConnectorAuthorizeUrl("google", {
restApi: client.rest,
teamId,
accessLevel: "full_access",
webRedirect: "https://yourapp.com/connectors/callback",
});
console.log("Redirect user to:", url);
// After authorization, check state:
const state = await client.rest.getConnectorState("google", teamId);
console.log("Connected:", state.connected);
console.log("Scopes:", state.scopes);
}
```
---
## Config validation
Validate a YAML config before deploying it to production.
```bash
# Via API
curl -X POST "https://api.archastro.ai/api/v2/config/validate" \
-H "Authorization: Bearer ${ARCHASTRO_SECRET_KEY}" \
-H "Content-Type: application/json" \
-d '{
"kind": "AIWorker",
"content": "kind: AIWorker\nid: my_assistant\nmodel: claude-sonnet-4-5-20250929"
}'
```
```bash
# Via CLI
archastro configs validate -k AIWorker --content "kind: AIWorker\nid: my_assistant"
```
---
## Secrets management
Store and retrieve encrypted secrets at different scopes.
```ts
// Personal secret
await client.rest.createPersonalSecret({
name: "openai_key",
value: "sk-...",
description: "OpenAI API key for agent completions",
});
const secret = await client.rest.getPersonalSecretValue("openai_key");
console.log("Value:", secret.value);
// Team secret
await client.rest.createTeamSecret(teamId, {
name: "stripe_key",
value: "sk_live_...",
description: "Stripe API key",
});
// Update
await client.rest.updatePersonalSecret("openai_key", {
value: "sk-new-key...",
});
// Delete
await client.rest.deletePersonalSecret("openai_key");
```
---
## CLI: full workflow
End-to-end workflow using only the CLI.
```bash
# 1. Initialize project
archastro init
# 2. Create an agent
archastro create agent -n "Support Bot" -k support \
-i "You are a helpful support agent"
# 3. Create a team and user
archastro create team -n "Support Team"
archastro create user -e customer@example.com -n "Test Customer"
archastro create user --system-user # bot service account
# 4. Create an automation
archastro create automation -n "Welcome" -t trigger --trigger "user.created"
# 5. Set up a webhook
archastro create appwebhook -p github -s my_secret
# 6. Sync and deploy configs
archastro configs sync
archastro configs deploy -m "Initial setup"
# 7. Check status
archastro list agents --json
archastro list automations
archastro auth status
```
---
### CLI
URL: https://staging.docs.archastro.ai/docs/cli
Summary: Manage apps, agents, configs, and operations from the command line with the archastro CLI.
## Overview
The ArchAstro CLI provides command-line access to every platform operation. It uses a **verb-first syntax** (`archastro `) and supports `--json` output for scripting and CI/CD pipelines.
---
## Installation
```bash
# Configure npm registry for @archastro scope
# Add to ~/.npmrc:
@archastro:registry=https://npm.pkg.github.com
//npm.pkg.github.com/:_authToken=YOUR_GITHUB_TOKEN
```
```bash
npm install -g @archastro/developer-platform-cli
```
Verify:
```bash
archastro --help
```
---
## Authentication
The CLI uses browser-based OAuth device flow:
```bash
archastro auth login
```
This opens your browser to `developers.archastro.ai/cli-auth`, starts a local callback server, and stores credentials in `~/.config/archastro/credentials.json` (mode 0600). Tokens are scoped per-app and refreshed automatically.
```bash
archastro auth status # Show current auth state
archastro auth logout # Remove all stored credentials
```
---
## Project initialization
```bash
cd my-project
archastro init
```
`init` opens your browser for app selection (or creation), generates API keys, and writes `archastro.json` to your project root:
```json
{
"app_id": "app_abc123",
"sandbox_id": "sbx_optional",
"configs": {
"enabled": true,
"directory": "configs"
}
}
```
---
## Settings
```bash
archastro settings get # Show all settings
archastro settings set app # Set default app
archastro settings set api-url # Override API URL
archastro settings set portal-url
archastro settings reset # Reset to defaults
archastro settings path # Show config file path
```
---
## Resource commands
All resources support a consistent verb pattern:
### Apps
```bash
archastro list apps
archastro describe app
```
### API keys
```bash
archastro list appkeys
archastro create appkey -t publishable # or -t secret
archastro revoke appkey
```
Secret keys are shown once at creation — copy immediately.
### Agents
```bash
archastro list agents
archastro list agents --search "support"
archastro describe agent
archastro create agent -n "Support Agent" -k support-bot \
-i "You are a customer support specialist"
archastro create agent -n "Alex" --profile-picture ./avatar.png
archastro update agent -n "Senior Support Agent"
archastro delete agent
```
Agent flags: `-n/--name`, `-k/--lookup-key`, `-e/--email`, `-p/--phone`, `-i/--identity`, `--team-id`, `--user-id`, `--profile-picture`.
### Users
```bash
archastro list users
archastro list users --search "john@example.com"
archastro describe user
archastro create user -e alice@example.com -n "Alice"
archastro create user --system-user # bot account, no login
archastro delete user
```
### Teams
```bash
archastro list teams
archastro list teams --search "engineering"
archastro describe team
archastro create team -n "Engineering" -d "Engineering department"
archastro update team -n "New Name"
archastro delete team
```
### Threads
```bash
archastro list threads
archastro describe thread
```
### Automations
```bash
archastro list automations
archastro list automations --type trigger
archastro list automations --type scheduled
archastro describe automation
archastro create automation -n "Welcome Email" -t trigger --trigger "user.created"
archastro create automation -n "Daily Report" -t scheduled --schedule "0 8 * * *"
archastro update automation -n "New Name"
archastro activate automation
archastro pause automation
archastro delete automation
```
### Files
```bash
archastro list files
archastro list files --team-id
archastro describe file
archastro create file --data "base64..." --filename "doc.pdf" --content-type "application/pdf"
archastro update file --filename "renamed.pdf"
```
### Environment variables
```bash
archastro list appenvvars
archastro describe appenvvar
archastro create appenvvar -k WEBHOOK_SECRET -v my_secret -d "Webhook signing secret"
archastro update appenvvar -v new_value
archastro delete appenvvar
```
### Webhooks
```bash
archastro list appwebhooks
archastro describe appwebhook
archastro create appwebhook -p github -s signing_secret
archastro update appwebhook --enabled false
archastro delete appwebhook
```
### OAuth providers
```bash
archastro list appoauthproviders
archastro describe appoauthprovider
archastro create appoauthprovider -p github \
--client-id abc123 --client-secret xyz789 \
--callback-urls "https://app.example.com/auth/github"
archastro update appoauthprovider --enabled false
archastro delete appoauthprovider
```
### Domains
```bash
archastro list appdomains
archastro create appdomain -d example.com
archastro delete appdomain
```
---
## Organization management
```bash
archastro list orgs
archastro describe org
archastro create org -n "Acme Corp" --slug acme --domain acme.com
archastro update org -n "Acme Corporation"
archastro delete org
archastro org invite -e alice@example.com -r developer # or -r admin
archastro org remove
archastro org invites # list pending
```
---
## Sandbox management
See [Sandboxes](/docs/sandboxes) for the full guide.
```bash
archastro list sandboxes # * marks active sandbox
archastro describe sandbox
archastro create sandbox -n "Staging" -s staging
archastro activate sandbox # opens browser to scope CLI to sandbox
```
### Sandbox keys
```bash
archastro list sandboxkeys --sandbox
archastro create sandboxkey --sandbox -t publishable # or -t secret
archastro revoke sandboxkey --sandbox
```
### Sandbox emails
```bash
archastro list sandboxmails --sandbox
archastro describe sandboxmail --sandbox
archastro delete sandboxmail --sandbox
archastro delete sandboxmails --sandbox --all
```
---
## Agent extensions
### Agent computers
```bash
archastro list agentcomputers --agent
archastro describe agentcomputer
archastro create agentcomputer --agent
archastro delete agentcomputer
```
### Agent working memory
```bash
archastro list agentworkingmemory --agent
```
### System configs
Browse and clone platform-provided config templates.
```bash
archastro list systemconfigs
archastro describe systemconfig
archastro clone systemconfig
```
---
## Configuration management
The CLI can sync configs between your local filesystem and the server, enabling version-controlled config workflows.
### Enable config sync
During `archastro init`, opt in to config management. This creates a `configs/` directory and a `.archastro-manifest.json` file that tracks server mappings.
### Pull configs from server
```bash
archastro configs sync # pull all
archastro configs sync --dry-run # preview changes
archastro configs sync --on-conflict overwrite # overwrite local on conflict
archastro configs sync --kind api-gateway # sync specific kind
archastro configs sync --prune-local # delete locally-tracked configs removed on server
```
### Push configs to server
```bash
archastro configs deploy # push all
archastro configs deploy --dry-run # preview changes
archastro configs deploy --prune # archive server configs deleted locally
archastro configs deploy -m "Update API rules" # with change message
```
### Other config operations
```bash
archastro configs content # show raw content
archastro configs kinds # list available kinds
archastro configs sample # show sample config
archastro configs sample --to-file f.yaml
archastro configs validate -k workflow --content "..."
archastro configs archive
archastro configs edit # open in browser editor
archastro configs new [filename] # create in browser editor
archastro configs mv # update manifest after move
archastro configs manifest-repair # fix manifest inconsistencies
```
---
## Scripting with JSON output
All commands support `--json` for machine-readable output:
```bash
# Get all agent IDs
archastro list agents --json | jq -r '.data[].id'
# Create a user and capture the ID
USER_ID=$(archastro create user -e bot@example.com --system-user --json | jq -r '.id')
# Pipe to other tools
archastro list teams --json | jq '.data[] | select(.name | contains("Eng"))'
```
---
## Shell completion
```bash
eval "$(archastro completion bash)" # add to ~/.bashrc
eval "$(archastro completion zsh)" # add to ~/.zshrc
archastro completion fish | source # or save to completions dir
```
---
## Configuration files
| File | Purpose |
|------|---------|
| `~/.config/archastro/config.json` | CLI settings (default app, URLs) |
| `~/.config/archastro/credentials.json` | Auth tokens (mode 0600) |
| `./archastro.json` | Project config (app ID, sandbox, config sync) |
| `./configs/.archastro-manifest.json` | Config sync state |
---
## Environment variables
| Variable | Purpose |
|----------|---------|
| `ARCHASTRO_DEV_API_URL` | Override API base URL |
| `ARCHASTRO_DEV_PORTAL_URL` | Override portal URL |
---
## Generated command index
The full command index below is auto-generated from the CLI source.
---
### For Coding Agents
URL: https://staging.docs.archastro.ai/docs/for-coding-agents
Summary: Canonical instructions, stable URLs, and deterministic setup for Claude Code, Codex, Gemini CLI, and other AI coding tools.
## Overview
This page is designed for AI coding agents. It provides everything you need to scaffold, build, and operate ArchAstro-powered applications without ambiguity.
---
## Quick setup prompt
Paste this into your project root to bootstrap an ArchAstro agent scaffold:
```text
Set up ArchAstro agent-first scaffolding in this repo.
1) Install:
npm i @archastro/sdk
2) Create:
- src/lib/archastro.ts (client initialization)
- src/agents/bootstrap-support-agent.ts
3) In src/lib/archastro.ts:
import { ArchAstroClient } from "@archastro/sdk";
export const client = new ArchAstroClient({
baseURL: "https://api.archastro.ai",
secretKey: process.env.ARCHASTRO_SECRET_KEY!,
});
4) In bootstrap-support-agent.ts:
- import { client } from "../lib/archastro"
- await client.ready
- create one agent via client.rest.createAgent({ name: "Support Agent" })
- create one routine via client.rest.createAgentRoutine({
agent_id: agent.id,
name: "handler",
event_type: "thread.message_added",
handler_type: "script",
script: "return { handled: true };"
})
- print created IDs
- call client.dispose()
5) Add npm script:
"archastro:bootstrap": "tsx src/agents/bootstrap-support-agent.ts"
Use env vars:
ARCHASTRO_SECRET_KEY (required)
ARCHASTRO_APP_ID (if calling reviewed developer endpoints under /protected/api/v2/developer/apps/:app_id/...)
```
---
## Required environment variables
Before running any ArchAstro operations, check that these are set. **Ask the user for values you don't have.**
| Variable | Required | Purpose |
|----------|----------|---------|
| `ARCHASTRO_SECRET_KEY` | Always | Server-side API authentication (`sk_live_` prefix) |
| `ARCHASTRO_APP_ID` | For developer endpoints | App-scoped control-plane operations |
| `NEXT_PUBLIC_ARCHASTRO_PK` | Client-side only | Browser SDK initialization (`pk_live_` prefix) |
| `SESSION_SECRET` | Next.js SDK only | Session encryption key |
Do not proceed with write operations without confirming these values exist.
---
## Canonical URLs
| Resource | URL |
|----------|-----|
| API base | `https://api.archastro.ai` |
| Developer portal | `https://developers.archastro.ai` |
| Documentation | `https://docs.archastro.ai` |
| LLM index | `https://docs.archastro.ai/llms.txt` |
| Extended LLM index | `https://docs.archastro.ai/llms-full.txt` |
| OpenAPI spec | `https://docs.archastro.ai/openapi.json` |
Treat these URLs as canonical. Do not infer or guess alternative endpoints.
---
## SDK packages
```bash
npm install @archastro/sdk # core SDK (always required)
npm install @archastro/sdk-nextjs # Next.js server helpers
npm install -g @archastro/developer-platform-cli # CLI (optional)
```
The CLI currently requires GitHub Packages registry access:
```bash
# Add to ~/.npmrc
@archastro:registry=https://npm.pkg.github.com
//npm.pkg.github.com/:_authToken=GITHUB_TOKEN
```
---
## Client initialization patterns
### Server-side (secret key)
```ts
import { ArchAstroClient } from "@archastro/sdk";
const client = new ArchAstroClient({
baseURL: "https://api.archastro.ai",
secretKey: process.env.ARCHASTRO_SECRET_KEY!,
});
await client.ready;
```
### Client-side (publishable key)
```ts
const client = new ArchAstroClient({
baseURL: "https://api.archastro.ai",
publishableKey: process.env.NEXT_PUBLIC_ARCHASTRO_PK!,
storageStrategy: "secure",
});
```
### BFF pattern (token provider)
```ts
const client = new ArchAstroClient({
baseURL: "https://api.archastro.ai",
publishableKey: "pk_live_...",
tokenProvider: {
async getTokens() {
const res = await fetch("/api/auth/session", { credentials: "include" });
return res.ok ? res.json() : null;
},
async onAuthExpired() {
window.location.href = "/login";
},
},
});
```
---
## Core SDK operations
### Agents
```ts
const agent = await client.rest.createAgent({ name: "My Agent", lookup_key: "my-agent" });
const agents = await client.rest.listAgents();
await client.rest.updateAgent(agent.id, { name: "Updated" });
await client.rest.deleteAgent(agent.id);
```
### Routines
```ts
const routine = await client.rest.createAgentRoutine({
agent_id: agent.id,
name: "handler",
event_type: "thread.message_added",
handler_type: "script",
script: "return { handled: true };",
});
```
### Threads and messages
```ts
const thread = await client.rest.createThread(teamId, "Title");
const messages = await client.rest.getThreadMessages(teamId, thread.id);
```
### Real-time
```ts
import { ChatRoomService } from "@archastro/sdk";
const chat = new ChatRoomService(client.socket);
const room = await chat.joinThread(teamId, threadId);
room.on("message_added", (e) => console.log(e.message.content));
await room.postMessage("Hello");
await room.leave();
```
### Networks (Agent Network)
```ts
// Teams and members
const team = await client.rest.createTeam({ name: "My Network" });
await client.rest.addTeamMember(team.id, { agent_id: agent.id, role: "member" });
// Participate routine (makes agent auto-respond)
await client.rest.createAgentRoutine({
agent_id: agent.id,
name: "participate",
event_type: "thread.message_added",
handler_type: "preset",
preset_name: "participate",
});
// Cross-org networking (team invites)
const invite = await client.rest.createTeamInvite(team.id);
// Share invite.join_code with partner org
await client.rest.joinTeam(joinCode, { agent_id: partnerAgent.id });
// Team member management
const members = await client.rest.getTeamMembers(team.id);
await client.rest.removeTeamMember(memberId);
```
### Connectors
```ts
import { buildConnectorAuthorizeUrl } from "@archastro/sdk";
const url = await buildConnectorAuthorizeUrl("google", {
restApi: client.rest, teamId, accessLevel: "full_access",
webRedirect: "https://app.example.com/callback",
});
```
### Configs
```ts
const configs = await client.rest.listConfigs({ kind: "workflow" });
const validation = await client.rest.validateConfig({
kind: "workflow", rawContent: yaml, mimeType: "application/x-yaml",
});
```
---
## API scopes
| Scope | Base path | Auth |
|-------|-----------|------|
| Public auth | `/api/v2/auth/...`, `/oauth/...` | Publishable key or none |
| User runtime | reviewed `/api/v2/users/...` endpoints | JWT access token |
| Team runtime | reviewed `/api/v2/teams/...` endpoints | JWT access token |
| Developer | reviewed `/protected/api/v2/developer/apps/:app_id/...` endpoints | Secret key |
Use [`/openapi.json`](/openapi.json) for the exact currently published operations. Internal and private subtrees under those roots are intentionally omitted from the public docs artifact.
---
## Resource IDs
Resource IDs use stable prefixed formats. In practice, external developers usually only need to know the resource type they are working with and pass IDs through SDK and API calls as returned by the platform.
---
## Machine-readable indexes
- **[/llms.txt](/llms.txt)** — lightweight page index for LLM context windows
- **[/llms-full.txt](/llms-full.txt)** — extended index with full page content
- **[/openapi.json](/openapi.json)** — OpenAPI 3.x specification
---
## Rules for coding agents
1. **Check env vars first** — ask the user for `ARCHASTRO_SECRET_KEY` before any API calls
2. **Use SDK methods** — prefer `client.rest.*` over raw HTTP requests
3. **Treat docs URLs as canonical** — do not infer or construct endpoints
4. **Check /openapi.json** — for the latest endpoint signatures and types
5. **Never expose secret keys** — `sk_live_` keys are server-only
6. **Await client.ready** — the client needs to hydrate auth before making calls
7. **Dispose when done** — call `client.dispose()` in scripts to clean up connections
---
## Notes for coding agents
- Treat docs URLs as canonical.
- Prefer API reference and setup docs for implementation details.
- Ask for missing environment variables before destructive operations.